

Winter camping offers a unique and rewarding experience, but it also presents distinct challenges. Proper planning is crucial to ensure safety, comfort, and enjoyment. This essay outlines the most important aspects to consider when preparing for a winter camping trip.
1. Choosing the Right Location
Accessibility and Safety
Assessing Accessibility
When planning a winter camping trip, accessibility is a top priority. Snow, ice, and unpredictable weather can make travel to and from your campsite challenging. Here are key considerations:
- Road Conditions: Research whether roads leading to your chosen site are plowed and maintained during winter. Some forest roads or mountain passes may be closed or impassable due to snow accumulation.
- Parking: Ensure there is a safe and legal place to park your vehicle. Avoid parking in areas where snowplows operate or where your car could become snowed in.
- Trail Access: If hiking to your campsite, evaluate the trail’s difficulty and distance. Snow-covered trails can be much harder to navigate and may require snowshoes or skis.
Proximity to Emergency Services
Safety is paramount in winter conditions, where emergencies can escalate quickly. Consider the following:
- Distance to Help: Choose a location within reasonable distance of emergency services, such as ranger stations, hospitals, or rescue teams. Remote sites may be beautiful but can be risky if help is far away.
- Cell Service: Check if the area has reliable cell phone coverage. In areas without service, consider bringing a satellite communicator or personal locator beacon.
- Escape Routes: Identify alternative exit routes in case your primary path becomes blocked by snow, fallen trees, or other hazards.
Shelter Options in Severe Weather
Winter weather can change rapidly, and having backup shelter options is critical:
- Natural Shelters: Look for areas with natural windbreaks, such as dense tree stands or rock formations, which can provide protection from wind and blowing snow.
- Man-Made Shelters: Some parks or wilderness areas have winter shelters, cabins, or warming huts available. Know their locations and reservation requirements.
- Evacuation Plan: Always have a plan for seeking shelter elsewhere if conditions become dangerous, such as blizzards or extreme cold snaps.
Additional Safety Considerations
- Avalanche Risk: In mountainous regions, avoid camping in avalanche-prone areas. Learn to recognize avalanche terrain and check local avalanche forecasts.
- Water Sources: Ensure access to a reliable water source that won’t freeze solid, or plan to melt snow safely.
- Wildlife: While many animals hibernate, some (like bears in certain regions) may still be active. Store food securely and follow local guidelines.
Choosing the right location for winter camping involves more than just picking a scenic spot. Prioritize accessibility, proximity to help, and shelter options to ensure your safety and comfort. Thorough research and contingency planning can make the difference between a challenging adventure and a dangerous situation.
Environmental Impact
Minimizing Environmental Damage
Winter landscapes are fragile, and human activity can have lasting effects even when snow covers the ground. To reduce your impact:
- Use Established Campsites: Whenever possible, camp in designated or previously used sites. These areas are already compacted and less likely to suffer further damage. Avoid creating new clearings or disturbing untouched snow and vegetation.
- Stay on Durable Surfaces: Set up tents and walk on snow, rock, or bare ground rather than on delicate plants or moss that may be exposed. Snow acts as a protective layer, but in shallow areas, trampling can harm underlying life.
- Leave No Trace: Pack out all trash, leftover food, and waste. In winter, decomposition is slow, so even small items can persist for months. Use portable toilets or follow proper procedures for disposing of human waste in snow.
Avoiding Hazardous Areas
Certain locations pose both environmental and personal risks in winter:
- Avalanche-Prone Slopes: Never camp at the base of steep slopes, gullies, or below cornices where avalanches may occur. Consult local avalanche forecasts and learn to recognize warning signs such as recent slides or unstable snowpacks.
- Falling Branches (Widowmakers): Heavy snow and ice can cause tree branches to break and fall unexpectedly. Avoid pitching your tent under trees with large, dead, or overhanging limbs. Look up before setting up camp.
- Flooding from Melting Snow: As temperatures rise, snow can melt rapidly, causing water to pool in low-lying areas. Avoid depressions, dry stream beds, or areas near rivers that could flood during a thaw or rain-on-snow event.
Protecting Wildlife and Vegetation
- Wildlife Disturbance: Animals are especially vulnerable in winter, expending extra energy to survive. Avoid camping near animal dens or feeding areas, and keep noise to a minimum.
- Vegetation Preservation: Even dormant plants can be damaged by repeated trampling. Stick to established paths and campsites, and avoid breaking branches or collecting live wood for fires.
Being mindful of your environmental impact is essential for preserving winter wilderness. By choosing established campsites, avoiding hazardous areas, and following Leave No Trace principles, you help protect fragile ecosystems and ensure that these beautiful places remain unspoiled for future adventurers.
2. Weather Awareness
Monitoring Forecasts
Importance of Weather Monitoring
Weather in winter environments can be unpredictable and severe, making it essential to stay informed before and during your camping trip. Accurate weather awareness helps you:
- Plan Appropriately: Knowing the forecast allows you to pack suitable gear, plan your route, and schedule activities for optimal safety and comfort.
- Avoid Dangerous Conditions: Early warnings about storms, extreme cold, or high winds can help you avoid hazardous situations or decide to postpone your trip.
How to Monitor Weather
- Before Your Trip:
- Check multiple reliable sources, such as the National Weather Service, Environment Canada, or local meteorological agencies.
- Look for detailed, location-specific forecasts, including temperature ranges, wind speeds, precipitation, and potential weather advisories.
- Pay attention to trends over several days, not just the day of departure.
- During Your Trip:
- Bring a portable weather radio or use a smartphone app (if coverage allows) to receive updates.
- In remote areas, consider a satellite communicator with weather update capabilities.
- Observe the environment for signs of changing weather, such as shifting winds, cloud formations, or sudden drops in temperature.
Preparing for Sudden Changes
Winter weather can shift rapidly, sometimes with little warning. Preparation is key:
- Snowstorms:
- Carry extra food, water, and fuel in case you’re delayed or need to shelter in place.
- Know how to reinforce your tent and create windbreaks using snow or natural features.
- Practice setting up camp quickly in adverse conditions.
- Extreme Cold:
- Pack clothing and sleeping gear rated for temperatures lower than forecasted lows.
- Learn to recognize and treat cold-related illnesses like hypothermia and frostbite.
- Have contingency plans for seeking shelter or evacuating if temperatures become dangerously low.
- Wind and Whiteouts:
- High winds can make cold temperatures feel even colder (wind chill) and damage tents or gear.
- Whiteout conditions can disorient even experienced campers—carry navigation tools and know how to use them.
Understanding Local Weather Patterns
- Microclimates:
- Mountains, valleys, and bodies of water can create localized weather patterns. For example, valleys may trap cold air, while ridges may be windier.
- Seasonal Hazards:
- Be aware of seasonal risks such as freezing rain, ice storms, or rapid thaws that can cause flooding.
Consistent and proactive weather monitoring is a cornerstone of safe winter camping. By checking forecasts, preparing for sudden changes, and understanding local weather patterns, you can make informed decisions that protect your safety and enhance your winter camping experience.
Understanding Risks
Winter camping exposes you to unique environmental hazards that can quickly become life-threatening if not properly managed. Understanding these risks—and knowing how to recognize and respond to them—is essential for a safe and enjoyable trip.
Hypothermia
What is Hypothermia? Hypothermia occurs when your body loses heat faster than it can produce it, causing your core temperature to drop below the normal range. This can happen even in temperatures above freezing, especially if you are wet or exposed to wind.
Causes:
- Prolonged exposure to cold, wet, or windy conditions
- Wearing inadequate or wet clothing
- Exhaustion or dehydration
Signs and Symptoms:
- Shivering (may stop as hypothermia worsens)
- Slurred speech or mumbling
- Clumsiness and lack of coordination
- Confusion or memory loss
- Drowsiness or exhaustion
- Slow, shallow breathing
Prevention and Response:
- Dress in layers and stay dry
- Keep moving to generate body heat
- Eat high-energy foods and stay hydrated
- If symptoms appear, get the person into dry, warm clothing and shelter, and provide warm (not hot) drinks and blankets
Frostbite
What is Frostbite? Frostbite is the freezing of skin and underlying tissues, most commonly affecting fingers, toes, nose, ears, and cheeks.
Causes:
- Exposure to very cold temperatures, especially with wind
- Inadequate protection of extremities
Signs and Symptoms:
- Numbness or tingling in affected areas
- Skin that appears white, grayish-yellow, or waxy
- Hard or frozen feeling skin
- Blisters (in severe cases)
Prevention and Response:
- Wear insulated gloves, socks, and hats
- Keep extremities dry and covered
- Avoid tight clothing that restricts blood flow
- If frostbite is suspected, move to a warm area and gently rewarm the affected parts (do not rub or use direct heat)
Wind Chill
What is Wind Chill? Wind chill is the perceived decrease in air temperature felt by the body due to wind. Wind removes the thin layer of warm air at the skin’s surface, making you feel colder than the actual air temperature.
Risks:
- Increases the risk of both hypothermia and frostbite
- Can make exposed skin freeze in minutes at very low temperatures
How to Manage Wind Chill:
- Check wind chill charts before heading out
- Use windproof outer layers to reduce heat loss
- Set up camp in sheltered areas, away from open ridges or valleys where wind is strongest
Other Local Hazards
- Avalanches: In mountainous areas, learn to recognize avalanche terrain and check local forecasts.
- Thin Ice: Avoid crossing frozen lakes or rivers unless you are certain the ice is thick and stable.
- Falling Branches: Heavy snow and ice can cause branches to break unexpectedly.
Understanding and respecting the risks of hypothermia, frostbite, and wind chill is vital for winter camping. Learn the signs and symptoms, take preventive measures, and be prepared to act quickly if problems arise. This knowledge can make the difference between a safe adventure and a dangerous emergency.
3. Clothing and Layering
Layering System
Proper clothing is your first line of defense against the cold, wet, and windy conditions of winter camping. The three-layer system is a proven approach that allows you to adapt to changing weather and activity levels, keeping you warm, dry, and comfortable.
1. Moisture-Wicking Base Layer
Purpose: The base layer sits directly against your skin and is responsible for wicking sweat away from your body. Staying dry is crucial, as moisture can quickly sap your body heat and increase the risk of hypothermia.
Materials:
- Synthetic fabrics (like polyester or polypropylene)
- Merino wool (naturally odor-resistant and warm even when damp)
- Avoid cotton, which retains moisture and dries slowly
Features:
- Snug but comfortable fit
- Long sleeves and full-length bottoms for maximum coverage
Tips:
- Bring an extra base layer to change into if you get wet from sweat or snow
- Consider lightweight or midweight options depending on expected temperatures and your activity level
2. Insulating Middle Layer
Purpose: The middle layer traps body heat to keep you warm. It should be thick enough to provide insulation but still allow moisture to move outward.
Materials:
- Fleece (lightweight, breathable, and quick-drying)
- Down (excellent warmth-to-weight ratio, but loses insulation when wet)
- Synthetic insulation (retains warmth even when damp, good for wet conditions)
- Wool sweaters (traditional but heavier)
Features:
- Full-zip or half-zip tops for ventilation
- Puffy jackets or vests for added warmth
- Layering multiple thin pieces can be more versatile than one thick garment
Tips:
- Adjust your insulating layer based on activity: remove it when hiking to avoid sweating, add it during rest or at camp
- Carry an extra insulating layer for emergencies or unexpected cold snaps
3. Waterproof, Windproof Outer Layer (Shell)
Purpose: The outer layer shields you from wind, rain, and snow, preventing your inner layers from getting wet and your body from losing heat.
Materials:
- Waterproof/breathable fabrics (like Gore-Tex or eVent)
- Durable Water Repellent (DWR) coatings for added protection
- Hard shells (maximum protection) or soft shells (more breathable, less waterproof)
Features:
- Adjustable hoods, cuffs, and hems to seal out the elements
- Pit zips or ventilation openings to release excess heat and moisture
- Roomy enough to fit over your other layers without restricting movement
Tips:
- Test your shell’s waterproofing before your trip and reapply DWR if needed
- Bring rain pants or gaiters for lower body protection in deep snow or wet conditions
Adapting the System
- Layer Up or Down: Add or remove layers as your activity level or the weather changes. Overdressing can cause sweating, while underdressing can lead to rapid heat loss.
- Accessories: Don’t forget hats, gloves, neck gaiters, and warm socks—these are essential for protecting extremities.
- Ventilation: Use zippers and vents to regulate temperature and prevent moisture buildup inside your clothing.
The three-layer clothing system is the foundation of winter camping comfort and safety. By choosing the right materials and adjusting your layers as needed, you can stay warm, dry, and protected from the elements, no matter how harsh the winter weather becomes.
Accessories
When camping in winter, accessories are not just optional add-ons—they are essential components of your clothing system that protect vulnerable parts of your body from the cold. Proper accessories help prevent heat loss, frostbite, and discomfort, ensuring you stay safe and warm throughout your trip.
Insulated Gloves and Mittens
Importance: Your hands are highly susceptible to cold and frostbite. Dexterity is also crucial for tasks like setting up camp or cooking, so keeping your hands warm and functional is a priority.
Types:
- Liner Gloves: Thin, moisture-wicking gloves worn as a base layer. They provide light insulation and allow you to perform fine tasks without exposing your skin.
- Insulated Gloves: Thicker gloves with synthetic or down insulation for warmth. Look for waterproof and windproof shells.
- Mittens: Warmer than gloves because fingers share heat. Ideal for extremely cold conditions, though they reduce dexterity.
Tips:
- Bring at least two pairs in case one gets wet.
- Consider glove liners for added warmth and flexibility.
Hats and Headwear
Importance: A significant amount of body heat can be lost through your head, especially in cold and windy conditions.
Types:
- Beanies or Knit Caps: Made from wool or synthetic fibers, they provide excellent insulation.
- Balaclavas: Cover the head, neck, and part of the face for maximum protection.
- Ear Bands: Useful for milder conditions or as an extra layer under a hat.
Tips:
- Always carry a spare hat in case one becomes wet.
- Choose headwear that covers your ears and fits comfortably under a hood or helmet.
Scarves, Neck Gaiters, and Face Masks
Importance: The neck and lower face are often exposed to wind and cold, making them vulnerable to frostbite and heat loss.
Types:
- Scarves: Versatile and can be wrapped in various ways, but may come loose.
- Neck Gaiters/Buffs: Tubular fabric that can be pulled up over the mouth and nose. Made from fleece, wool, or synthetic materials.
- Face Masks: Provide full coverage for the nose, cheeks, and mouth, especially useful in windy or extremely cold conditions.
Tips:
- Choose moisture-wicking materials to prevent dampness from breath.
- Layer neck protection with your jacket collar for added warmth.
Thermal Socks and Footwear Accessories
Importance: Feet are prone to cold and moisture, which can lead to frostbite or trench foot.
Types:
- Thermal Socks: Made from wool or synthetic blends, they provide insulation and wick moisture.
- Sock Liners: Thin, moisture-wicking socks worn under thicker socks to keep feet dry.
- Gaiters: Worn over boots and lower pants to keep snow and moisture out.
- Boot Warmers or Insoles: For extremely cold conditions, consider chemical warmers or insulated insoles.
Tips:
- Bring multiple pairs of socks to change into if your feet get wet.
- Avoid tight boots, which can restrict circulation and increase the risk of cold injuries.
Extra Clothing
Why Bring Extras? Wet clothing loses its insulating properties and can rapidly increase your risk of hypothermia. Having spare accessories and base layers ensures you can always change into something dry.
What to Pack Extra:
- At least one extra pair of gloves/mittens, socks, and a hat
- An additional base layer top and bottom
- A spare neck gaiter or scarf
Storage:
- Keep spare items in a dry bag or waterproof stuff sack to protect them from snow and moisture.
Accessories like insulated gloves, hats, scarves, and thermal socks are critical for protecting extremities and exposed skin during winter camping. Always bring extras in case items get wet, and choose materials that insulate and wick moisture. Proper accessory planning can make the difference between a comfortable adventure and a dangerous situation.
4. Shelter and Sleeping Arrangements
Winter-Ready Tents
A reliable shelter is the cornerstone of winter camping safety and comfort. The right tent protects you from snow, wind, and freezing temperatures, while also providing a secure space to rest and recover. Here’s what to consider when selecting and using a winter-ready tent:
Four-Season Tents: Built for Winter
What Makes a Tent “Four-Season”? Four-season tents are specifically engineered to handle the harsh conditions of winter. Their design features include:
- Stronger Poles and Frames: Made from robust materials (like aluminum or high-grade composites) and often with more poles than three-season tents, these frames can support heavy snow loads and resist strong winds.
- Steep Walls: Steeper wall angles help shed snow, preventing accumulation that could collapse the tent.
- Durable Fabrics: Thicker, more tear-resistant materials block wind and retain warmth better than lightweight summer tents.
- Full-Coverage Rainfly: Extends close to the ground, offering extra protection from blowing snow and wind.
Why Not Use a Three-Season Tent? Three-season tents are lighter and more ventilated, but they lack the structural strength and weatherproofing needed for winter. They may collapse under snow or allow cold drafts inside.
Ventilation: Managing Condensation
The Condensation Problem: In cold weather, warm, moist air from your breath and body meets the cold tent walls, causing condensation. This can drip onto your gear and sleeping bag, making you cold and uncomfortable.
Ventilation Solutions:
- Vents and Mesh Panels: Four-season tents often include adjustable vents. Keep them open as much as possible, even in cold weather, to allow moist air to escape.
- Double-Wall Construction: An inner tent and outer rainfly create an insulating air gap and help manage moisture.
- Site Selection: Pitch your tent in a spot with some airflow (but not exposed to strong winds) to aid ventilation.
Tips to Reduce Condensation:
- Avoid cooking inside the tent, as this adds moisture.
- Dry wet clothing outside the sleeping area if possible.
- Use a small towel to wipe down tent walls in the morning.
Additional Features for Winter Comfort
- Snow Flaps: Some tents have flaps at the base of the rainfly that can be buried in snow to seal out drafts.
- Large Vestibules: Provide space to store boots, packs, and wet gear outside the sleeping area, keeping the interior drier and cleaner.
- Guy Lines and Stakes: Use extra guy lines and snow stakes (or deadman anchors) to secure your tent in deep snow and high winds.
Setting Up Your Tent in Snow
- Site Preparation: Pack down the snow where you’ll pitch your tent to create a firm, level surface. This prevents you from sinking during the night.
- Anchoring: Regular tent stakes may not hold in snow. Use snow stakes, bury sticks or stuff sacks filled with snow as anchors.
- Wind Protection: Set up your tent behind natural windbreaks (like trees or snow walls) if possible, but avoid areas where snow or branches could fall.
A winter-ready, four-season tent is essential for safe and comfortable winter camping. Look for strong construction, good ventilation, and features designed for snow and wind. Proper setup and site selection further enhance your shelter’s effectiveness, ensuring you stay warm, dry, and protected throughout your adventure.
Using a Hammock Instead of a Tent
While tents are the traditional choice for winter camping, some experienced campers opt for hammocks as an alternative. Hammock camping in winter can offer unique advantages, but it also presents specific challenges that require careful planning and specialized gear.
Advantages of Winter Hammock Camping
- Versatility in Site Selection: Hammocks allow you to camp on uneven, rocky, or snow-covered ground where pitching a tent would be difficult, as long as there are sturdy trees available.
- Reduced Ground Contact: Sleeping above the ground keeps you away from cold, wet, or uneven surfaces, potentially reducing heat loss through conduction.
- Lightweight and Compact: Hammock setups can be lighter and take up less space in your pack compared to some four-season tents.
Essential Gear for Winter Hammock Camping
- Four-Season Hammock: Choose a hammock made from durable materials, with a built-in bug net or weather cover for added protection.
- Insulation:
- Underquilt: A thick, insulated quilt that hangs beneath the hammock to prevent heat loss from below. Essential in cold weather, as sleeping pads alone often compress and lose effectiveness.
- Top Quilt or Sleeping Bag: Use a sleeping bag rated for winter temperatures or a specialized top quilt for warmth above.
- Tarp or Rainfly: A large, waterproof tarp is crucial for shielding you from snow, wind, and rain. Look for tarps with doors or beaks that can be closed for full coverage.
- Suspension System: Use tree-friendly straps wide enough to prevent damage to bark, and ensure your system is rated for winter loads.
Key Considerations and Tips
- Site Selection: Choose trees that are healthy and sturdy, spaced an appropriate distance apart (usually 12–15 feet). Avoid dead trees or those with overhanging branches that could fall under snow load.
- Wind Protection: Set up your hammock with the tarp’s sides pitched low to the ground to block wind. Use natural windbreaks like dense trees or snow walls when possible.
- Condensation Management: Good airflow under the tarp helps reduce condensation, but be mindful of wind chill. Adjust tarp doors or vents as needed.
- Staying Warm:
- Dress in layers, including insulated socks, gloves, and a hat.
- Use a vapor barrier liner inside your sleeping bag if temperatures are extremely low.
- Keep extra clothing and gear inside your hammock or in a gear sling to prevent freezing.
Challenges of Winter Hammock Camping
- Learning Curve: Hammock camping in winter requires practice to master insulation, setup, and staying warm.
- Limited Group Shelter: Hammocks are generally solo shelters, making it harder to share warmth or space with others.
- Tree Availability: In treeless environments or above the tree line, hammocks are not a viable option.
Hammock camping in winter can be a comfortable and enjoyable alternative to tents, provided you have the right gear and skills. Proper insulation, weather protection, and site selection are critical for staying warm and safe. With preparation and experience, a hammock can offer a unique and rewarding winter camping experience.
Sleeping Gear
A restful, warm night’s sleep is crucial for safety and enjoyment during winter camping. The right sleeping gear protects you from the cold, conserves your body heat, and helps you recover for the next day’s activities. Here’s how to optimize your sleep system for winter conditions:
Sleeping Bags: Choosing the Right One
Temperature Ratings:
- Always select a sleeping bag rated for temperatures lower than the coldest conditions you expect. For example, if the forecast low is -10^\circC, choose a bag rated for -15^\circC or colder.
- Consider your personal comfort—if you tend to sleep cold, err on the side of a warmer bag.
Types of Insulation:
- Down:
- Excellent warmth-to-weight ratio and compressibility.
- Loses insulating power when wet, so ensure your bag has a water-resistant shell or use a bivy sack.
- Higher fill power (e.g., 800+) means better insulation.
- Synthetic:
- Retains warmth even when damp and dries faster than down.
- Bulkier and heavier, but often more affordable and reliable in wet conditions.
Bag Shape and Features:
- Mummy Bags:
- Tapered shape reduces dead air space and maximizes warmth.
- Snug fit with a hood to trap heat around your head.
- Draft Collars and Tubes:
- Prevent warm air from escaping through the zipper or hood.
- Zipper Placement:
- Side zippers are common; some bags have two-way zippers for ventilation.
Tips:
- Fluff your sleeping bag before use to maximize loft.
- Store your bag uncompressed at home to preserve insulation.
Insulated Sleeping Pads: The Barrier Against Ground Cold
Why Pads Matter:
- The ground can sap heat from your body much faster than the air, especially when sleeping on snow or frozen earth.
- Even the warmest sleeping bag won’t insulate you from below if you don’t have a proper pad.
Types of Sleeping Pads:
- Closed-Cell Foam Pads:
- Lightweight, durable, and provide reliable insulation even if punctured.
- Can be used as a base layer under another pad for extra warmth.
- Self-Inflating Pads:
- Combine foam and air for comfort and insulation.
- More comfortable but heavier and bulkier.
- Inflatable Pads:
- Lightweight and packable, with high R-values available for winter use.
- Must be insulated (look for reflective or synthetic fill inside) and protected from punctures.
R-Value:
- Indicates a pad’s insulating ability; higher R-values mean better insulation.
- For winter camping, aim for a combined R-value of 4.5 or higher. You can stack two pads (e.g., a foam pad under an inflatable pad) to increase insulation.
Tips:
- Place a foam pad on top of snow, then your inflatable or self-inflating pad on top for maximum warmth and protection.
- Avoid direct contact with the ground—always use a pad, even inside a tent or bivy.
Additional Sleep System Enhancements
- Sleeping Bag Liners:
- Add warmth (up to 5–15°C depending on material) and keep your bag cleaner.
- Pillow or Stuff Sack:
- Use a small pillow or stuff sack filled with clothes for comfort and to prevent heat loss from your head.
- Vapor Barrier Liners:
- Used in extreme cold to prevent moisture from your body from dampening your sleeping bag insulation.
Tips for Staying Warm at Night
- Eat a high-calorie snack before bed to fuel your body’s heat production.
- Wear dry, loose-fitting base layers and warm socks.
- Fill a water bottle with hot (not boiling) water and place it in your bag for extra warmth.
- Avoid breathing into your sleeping bag, as moisture can reduce insulation.
A winter sleep system relies on a well-rated sleeping bag and an insulated sleeping pad to keep you warm and safe. Choose gear appropriate for the lowest expected temperatures, pay attention to insulation from both above and below, and consider additional enhancements for maximum comfort. Proper sleeping gear is your best defense against the cold, ensuring restful nights and energized days in the winter wilderness.
Sleeping Gear for Hammocks
Sleeping comfortably and safely in a hammock during winter requires a specialized approach to insulation and warmth. Unlike tents, hammocks expose you to cold air on all sides, making it essential to address both top and bottom insulation. Here’s how to optimize your hammock sleep system for winter camping:
Bottom Insulation: Underquilts and Pads
Why Bottom Insulation Is Critical: When you lie in a hammock, your body compresses the insulation beneath you, reducing its effectiveness and allowing cold air to draw heat away rapidly. This is known as “cold butt syndrome.”
Underquilts:
- What They Are: Insulated quilts that hang beneath your hammock, creating a warm air pocket and preventing heat loss from below.
- Materials: Available in down or synthetic fill, with down offering better warmth-to-weight but requiring more care to keep dry.
- Temperature Ratings: Choose an underquilt rated for temperatures lower than you expect to encounter.
- Fit: Ensure the underquilt fits snugly against the bottom of your hammock without gaps, as drafts can quickly chill you.
Sleeping Pads:
- Closed-Cell Foam Pads: Lightweight and reliable, these can be placed inside the hammock for extra insulation.
- Inflatable Pads: Some campers use inflatable pads with high R-values, but they can shift during the night and may not contour as well to the hammock shape.
- Double Layer Hammocks: Some hammocks have a sleeve for holding a pad in place, improving comfort and insulation.
Tips:
- Many winter hammock campers use both an underquilt and a pad for maximum warmth.
- Practice setting up your insulation at home to ensure a good fit and no cold spots.
Top Insulation: Sleeping Bags and Top Quilts
Top Quilts:
- What They Are: Similar to a sleeping bag but without a back or hood, top quilts are designed specifically for hammock use and drape over you like a blanket.
- Advantages: Lighter and less restrictive than sleeping bags, and easier to adjust for ventilation.
Sleeping Bags:
- Usage: Mummy-style sleeping bags can be used in hammocks, but it can be tricky to zip up and move inside the hammock.
- Temperature Rating: As with tents, choose a bag rated for colder than expected temperatures.
Tips:
- Wear a warm hat or balaclava, as top quilts often lack hoods.
- Consider a sleeping bag liner for added warmth.
Additional Gear and Tips
- Pillows: Use a small pillow or stuff sack filled with clothes to support your neck and prevent heat loss from your head.
- Draft Collars: Some underquilts and top quilts have draft collars to seal out cold air at the edges.
- Hot Water Bottle: Place a warm water bottle in your hammock for extra heat at bedtime.
- Clothing: Wear dry, insulated layers, and avoid overdressing, which can cause sweating and dampness.
Winter hammock camping demands careful attention to both bottom and top insulation. Underquilts are the gold standard for preventing heat loss from below, while top quilts or sleeping bags provide warmth above. Combining these with proper site selection, wind protection, and warm clothing ensures a safe and comfortable night’s sleep—even suspended in the winter air.
5. Food and Hydration
High-Calorie Meals
Proper nutrition is vital for winter camping, where your body works harder to stay warm and active. Cold weather increases your caloric needs, and eating the right foods at the right times helps maintain your energy, body heat, and morale. Here’s how to plan and prepare high-calorie meals for winter camping:
Why High-Calorie Meals Matter
- Increased Energy Demands: Your body burns more calories in cold weather to generate heat and keep your core temperature stable. Activities like hiking through snow, setting up camp, and simply staying warm can double your usual caloric requirements.
- Thermogenesis: Eating, especially foods rich in fats and proteins, stimulates thermogenesis—the process of heat production in the body. This helps you stay warmer, especially at night.
What to Eat: Calorie-Dense Foods
- Fats: Fats provide more than twice the calories per gram compared to carbohydrates or proteins. They digest slowly, offering sustained energy and warmth. Examples: Cheese, nuts, nut butters, salami, olive oil, chocolate, and energy bars with high fat content.
- Carbohydrates: Carbs are quickly converted to energy, making them ideal for immediate fuel during activity. Examples: Pasta, rice, bread, granola, dried fruit, energy gels, and oatmeal.
- Proteins: Proteins help repair muscles and keep you feeling full. Examples: Jerky, hard cheeses, beans, lentils, and protein bars.
Sample High-Calorie Meal Plan:
| Meal | Example Foods |
|---|---|
| Breakfast | Oatmeal with nuts, dried fruit, and butter; hot cocoa or coffee |
| Lunch | Tortillas with cheese and salami; trail mix; chocolate |
| Dinner | Pasta with olive oil and cheese; freeze-dried meals with added butter |
| Snacks | Energy bars, nut butter packets, jerky, granola, candy |
Hot Meals and Drinks: More Than Comfort
- Warming Effect: Hot food and beverages provide immediate warmth and psychological comfort, boosting morale in harsh conditions.
- Hydration Aid: Warm drinks encourage you to drink more, helping prevent dehydration (which is common in cold weather).
Ideas for Hot Meals:
- Instant soups and stews
- Freeze-dried meals (rehydrated with boiling water)
- Hot cereals (oatmeal, cream of wheat)
- Ramen noodles with added fats (oil, cheese, or peanut butter)
Hot Drink Options:
- Tea, coffee, or hot chocolate
- Broth or bouillon cubes dissolved in hot water
- Warm electrolyte drinks
Meal Preparation Tips
- Pre-Plan and Pre-Pack: Prepare meals at home to minimize cooking time and effort in the cold. Pre-portion ingredients and use resealable bags.
- Easy-to-Cook Foods: Choose meals that require minimal preparation and can be cooked with boiling water or a single pot.
- Keep Food from Freezing: Store food in insulated containers or inside your sleeping bag at night to prevent it from freezing solid.
- Add Extra Calories: Enhance meals with butter, oil, cheese, or nut butters for a calorie boost.
Nighttime Nutrition
- Eat Before Bed: Have a high-fat, high-calorie snack before sleeping. This gives your body fuel to burn overnight, helping you stay warmer in your sleeping bag.
High-calorie, hot meals are essential for winter camping, providing the energy and warmth your body needs to thrive in cold conditions. Focus on calorie-dense foods, plan easy-to-prepare hot meals, and don’t forget to snack regularly. Proper nutrition not only keeps you warm and energized but also enhances your overall winter camping experience.
Water Management
Staying hydrated is just as important in winter as it is in summer, but cold conditions introduce unique challenges. Water can freeze, making it inaccessible, and the body’s thirst response is often diminished in cold weather, increasing the risk of dehydration. Effective water management ensures you have a reliable supply of safe, drinkable water throughout your winter camping trip.
Preventing Water from Freezing
Insulated Bottles and Covers:
- Use double-walled, vacuum-insulated bottles (like Thermos or Hydro Flask) to keep water from freezing for several hours.
- For standard bottles, use insulating sleeves or DIY covers made from foam, neoprene, or even a thick wool sock.
- Store bottles inside your pack, wrapped in clothing, or in your sleeping bag at night for extra insulation.
Storing Bottles Upside Down:
- Water freezes from the top down. By storing bottles upside down, the ice forms at the bottom (near the lid), leaving the mouth of the bottle accessible for drinking.
- This trick is especially useful for wide-mouth bottles, which are easier to manage with gloves and less likely to freeze shut.
Body Heat:
- Carry a water bottle close to your body (inside your jacket) during the day to use your body heat to prevent freezing.
- At night, place bottles in your sleeping bag or between your sleeping pad and bag.
Avoiding Freezing in Hydration Bladders:
- Hydration tubes and bite valves freeze quickly. If you use a bladder, insulate the tube and blow air back into it after each sip to clear water from the tube.
- Consider using bottles instead of bladders in very cold conditions.
Melting Snow for Water
When to Melt Snow:
- If you run out of liquid water or are camping for multiple days, melting snow is a reliable way to replenish your supply.
- Always use clean, white snow—avoid snow that is discolored, near animal tracks, or contaminated by debris.
How to Melt Snow Efficiently:
- Use a stove with a large pot for melting snow. Liquid fuel stoves (like white gas) work best in freezing temperatures.
- Start with a small amount of liquid water in the pot to prevent scorching and speed up the melting process.
- Gradually add snow as it melts, stirring frequently.
Fuel Considerations:
- Melting snow requires significant fuel. Plan for extra fuel (often double your summer amount) to account for both cooking and water production.
Purifying Melted Snow
Why Purify?
- While fresh snow is generally clean, it can still contain bacteria, viruses, or pollutants, especially near campsites or animal activity.
- Always purify melted snow before drinking.
Purification Methods:
- Boiling: Bring water to a rolling boil for at least one minute (longer at higher elevations).
- Filters: Use a water filter rated for bacteria and protozoa. Note that some filters can freeze and break, so keep them warm.
- Chemical Treatments: Use iodine or chlorine dioxide tablets/drops. These are lightweight and effective, but require time to work and may not kill all viruses.
- UV Purifiers: Effective but batteries can drain quickly in cold weather; keep the device and batteries warm.
Additional Tips for Winter Hydration
- Drink Regularly: Don’t wait until you’re thirsty—sip water throughout the day to stay hydrated.
- Warm Drinks: Drinking warm water or tea can encourage you to drink more and help maintain body temperature.
- Monitor Urine Color: Pale yellow urine indicates good hydration; dark urine means you need to drink more.
Water management in winter camping requires proactive strategies to prevent freezing and ensure a safe, adequate supply. Use insulated bottles, store water upside down, and keep bottles warm. Melting snow is a reliable backup, but always purify it before drinking. By planning ahead and using these techniques, you’ll stay hydrated and healthy in the winter wilderness.
6. Fire and Cooking
Reliable Stoves
Cooking in winter is more challenging than in warmer seasons due to freezing temperatures, snow, and wind. A reliable stove is essential for preparing hot meals and drinks, melting snow for water, and maintaining morale and warmth. Choosing the right stove and knowing how to use it effectively can make a significant difference in your winter camping experience.
Stove Types and Their Suitability for Winter
1. Liquid Fuel Stoves (White Gas Stoves):
- Best Choice for Winter: Liquid fuel stoves (such as MSR WhisperLite or Coleman models) are the gold standard for winter camping. They perform reliably in sub-freezing temperatures and at high altitudes.
- How They Work: These stoves use white gas or similar fuels, which are pressurized manually and vaporize well even in the cold.
- Advantages:
- Consistent performance in extreme cold
- Easy to refill and carry extra fuel
- Can melt large quantities of snow efficiently
- Considerations:
- Require priming (pre-heating the fuel line)
- Heavier and bulkier than some canister stoves
- Need regular maintenance and cleaning
2. Canister Stoves:
- Limited Winter Use: Standard upright canister stoves (using isobutane/propane fuel) lose pressure and efficiency as temperatures drop below freezing.
- Workarounds:
- Use a remote canister stove with an inverted canister feature, which allows liquid fuel to feed the burner.
- Keep canisters warm by storing them in your sleeping bag or jacket.
- Use four-season fuel blends with higher propane content.
- Considerations:
- Less reliable in extreme cold
- Simpler to use than liquid fuel stoves
3. Alcohol and Solid Fuel Stoves:
- Not Recommended for Winter: These stoves have low heat output and are inefficient for melting snow or cooking in cold, windy conditions.
Practice and Preparation
- Familiarize Yourself: Practice assembling, lighting, and operating your stove at home, especially with gloves on. Winter conditions can make simple tasks more difficult.
- Maintenance: Clean and inspect your stove before your trip. Bring spare parts (like O-rings, jets, and tools) for field repairs.
- Fuel Planning: Estimate your fuel needs generously—melting snow for water uses much more fuel than cooking alone. Bring extra to account for delays or emergencies.
Cooking in Cold and Snow
- Wind Protection: Use a windscreen around your stove to improve efficiency and reduce fuel consumption. Be cautious to avoid trapping heat and causing fuel canisters to overheat.
- Stable Surface: Create a flat, stable platform for your stove by packing down snow or using a piece of wood or metal.
- Prevent Freezing: Keep fuel bottles and canisters warm when not in use. Cold fuel is harder to ignite and burns less efficiently.
- Safe Operation: Never use stoves inside a tent without proper ventilation—carbon monoxide buildup is deadly. Use vestibules or designated cooking shelters if available.
Backup Fire Options
- Campfires: If regulations and conditions allow, a campfire can provide warmth and a backup cooking method. However, finding dry wood in winter is often difficult, and fires can damage the environment.
- Fire Starters: Bring reliable fire-starting materials (waterproof matches, lighters, firesteel, and tinder) as a backup, but don’t rely solely on campfires for cooking.
A reliable stove is a cornerstone of winter camping safety and comfort. Liquid fuel stoves are the most dependable in freezing temperatures, but remote canister stoves with inverted canisters can also work with precautions. Practice using your stove, plan for extra fuel, and always prioritize safety and efficiency when cooking in the cold. Proper stove selection and preparation ensure you can enjoy hot meals and safe hydration, no matter how harsh the winter conditions.
Fire Safety
Building and maintaining a campfire in winter can be rewarding, providing warmth, a means to cook, and a morale boost. However, winter conditions introduce unique challenges and responsibilities. Practicing fire safety is essential to protect yourself, the environment, and future campers.
Assessing Whether Fires Are Allowed
- Check Regulations: Before your trip, research local fire regulations. Some parks or wilderness areas prohibit fires year-round or during certain conditions, even in winter, to protect fragile environments or prevent wildfires.
- Designated Fire Rings: Use established fire rings or pits if available. These minimize environmental impact and reduce the risk of fire spreading.
Gathering and Preparing Firewood
- Finding Dry Wood:
- In winter, dry wood can be scarce. Look for dead branches off the ground, as wood lying on snow or wet ground is often saturated.
- Break or saw dead branches from standing trees (never live trees), as these are more likely to be dry.
- Types of Wood:
- Collect a mix of tinder (small twigs, dry grass, bark), kindling (finger-sized sticks), and larger fuel wood.
- Birch bark, pine needles, and resinous wood can help start fires in damp conditions.
- Processing Wood:
- Use a small saw or hatchet to process wood into manageable pieces.
- Split larger logs to expose dry inner wood.
Keeping Fire-Starting Materials Dry
- Waterproof Storage: Store matches, lighters, and fire starters in waterproof containers or zip-lock bags.
- Multiple Methods: Bring several fire-starting options: waterproof matches, stormproof lighters, firesteel, and commercial fire starters (cotton balls soaked in petroleum jelly, wax cubes, etc.).
- Body Heat: Keep fire-starting materials close to your body or in an inner pocket to prevent them from freezing.
Building and Maintaining a Safe Fire
- Site Selection:
- Choose a spot sheltered from wind and away from overhanging branches or tents.
- Clear snow down to bare ground or create a platform of packed snow or rocks.
- Fire Size:
- Keep fires small and manageable. Large fires consume more wood and increase the risk of accidents.
- Supervision:
- Never leave a fire unattended. Assign someone to monitor it at all times.
Extinguishing the Fire
- Drown, Stir, and Feel:
- Pour water on the fire, stir the ashes, and repeat until everything is cold to the touch.
- In freezing conditions, use snow to smother the fire, but ensure it melts and fully extinguishes embers.
- Scatter Ashes:
- If appropriate, scatter cold ashes to disperse impact, but only if allowed by local regulations.
Leave No Trace Principles
- Minimize Impact:
- Use existing fire rings or build mound fires on a platform of mineral soil or rocks to avoid scarring the ground.
- Burn only small sticks found on the ground that can be broken by hand.
- Pack Out Trash:
- Never burn plastics, foil, or other non-natural materials. Pack out all trash, including partially burned items.
- Restore the Site:
- Dismantle any fire structures you built and restore the area to its natural appearance.
Alternatives to Campfires
- Stoves: In many cases, a reliable stove is safer, more efficient, and less impactful than a campfire, especially above treeline or in sensitive environments.
- Portable Fire Pans: Some areas require the use of fire pans to contain fires and prevent ground damage.
Fire safety in winter camping requires careful planning, respect for regulations, and a commitment to Leave No Trace ethics. Gather dry wood responsibly, keep fire-starting materials protected, and always fully extinguish your fire. By following these guidelines, you can enjoy the benefits of a campfire while preserving the wilderness for others.
7. Emergency Preparedness
First Aid and Survival Gear
Winter camping environments are inherently more hazardous than their summer counterparts. Cold, snow, ice, and isolation can quickly turn minor mishaps into life-threatening emergencies. Being prepared with the right first aid and survival gear—and knowing how to use it—can make all the difference in a crisis.
Comprehensive First Aid Kit
Essential Contents:
- Bandages and Dressings: Adhesive bandages, gauze pads, adhesive tape, and elastic wraps for wounds, blisters, and sprains.
- Antiseptics: Alcohol wipes, iodine, or antiseptic ointment to clean wounds and prevent infection.
- Medications: Pain relievers (ibuprofen, acetaminophen), antihistamines, anti-diarrheal medication, and any personal prescriptions.
- Blister Care: Moleskin, hydrocolloid dressings, and blister pads.
- Burn Treatment: Burn gel or dressings for stove or fire-related injuries.
- Splinting Materials: SAM splint or similar, plus triangular bandages for immobilizing injuries.
- Thermal Blanket: Compact, reflective emergency blanket for warmth and shock treatment.
- CPR Mask: For safe resuscitation if needed.
- Tweezers and Scissors: For removing splinters, ticks, or cutting tape and clothing.
- Gloves: Nitrile gloves for infection control.
Winter-Specific Additions:
- Hand and Toe Warmers: For treating mild hypothermia or frostbite.
- Chemical Heat Packs: Useful for rewarming extremities or core body temperature.
- Lip Balm and Skin Cream: To prevent and treat chapped skin and lips.
Emergency Survival Gear
Shelter and Warmth:
- Emergency Blanket or Bivy Sack: Reflects body heat and provides wind and moisture protection if you’re stranded or injured.
- Extra Insulation: Spare hat, gloves, socks, and a dry base layer.
- Fire-Starting Kit: Waterproof matches, lighters, firesteel, and tinder for starting a fire in any condition.
Signaling Devices:
- Whistle: Loud, pealess whistle for attracting attention.
- Signal Mirror: For signaling rescuers in daylight.
- Bright-Colored Cloth or Flag: To increase visibility from a distance.
- Electronic Devices: Personal locator beacon (PLB), satellite messenger, or fully charged cell phone (with backup battery or power bank).
Navigation and Light:
- Map and Compass: Know how to use them in case GPS fails.
- Headlamp with Extra Batteries: Essential for navigation and emergencies during long winter nights.
Basic Winter First Aid Knowledge
Hypothermia:
- Recognize early signs: shivering, confusion, slurred speech, loss of coordination.
- Treatment: Move to shelter, remove wet clothing, insulate with dry layers and blankets, provide warm (not hot) drinks if conscious.
Frostbite:
- Signs: Numbness, pale or waxy skin, hard or frozen tissue.
- Treatment: Move to a warm area, rewarm affected parts gently (not by rubbing or direct heat), protect from refreezing, seek medical help.
Trench Foot:
- Caused by prolonged exposure to wet, cold conditions.
- Treatment: Dry and warm the feet, change into dry socks, elevate feet, and seek medical attention if severe.
Burns:
- From stoves, fires, or hot water.
- Treatment: Cool the burn with clean water, cover with sterile dressing, avoid breaking blisters.
Injuries:
- Sprains, fractures, and wounds are harder to manage in cold. Immobilize injuries, keep the person warm, and evacuate if necessary.
Preparation and Practice
- Know Your Gear: Familiarize yourself with all first aid and survival items before your trip.
- Take a Course: Consider a wilderness first aid or winter survival course to build confidence and skills.
- Practice Scenarios: Rehearse emergency situations with your group, including shelter building, signaling, and first aid.
Carrying a well-stocked first aid kit, emergency shelter, and signaling devices is non-negotiable for winter camping. Equally important is knowing how to use them and understanding basic winter first aid. Preparation and knowledge are your best defenses against the unexpected, ensuring you can respond effectively to emergencies and protect yourself and your group in the winter wilderness.
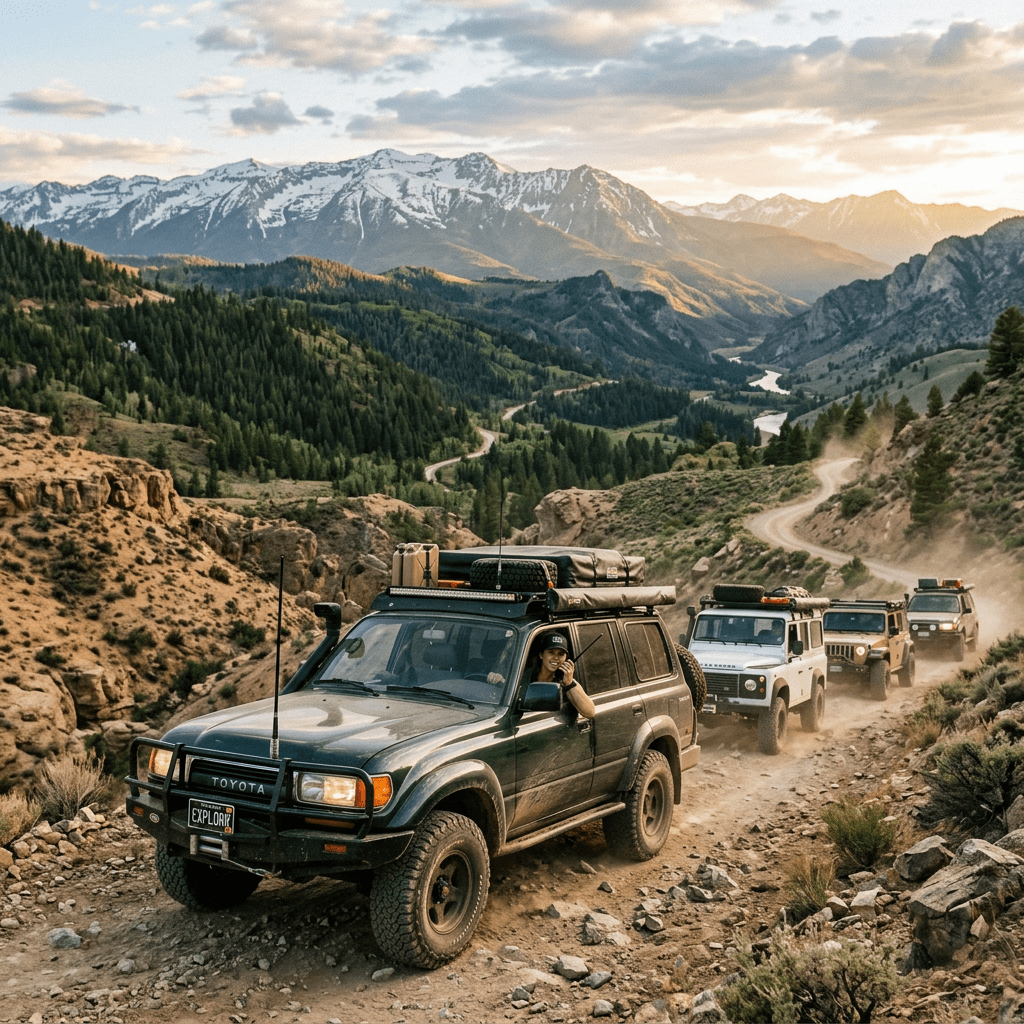
Communication
Effective communication is a cornerstone of winter camping safety. In cold, remote environments, the ability to call for help or share your location can be lifesaving. Winter conditions can also make navigation and rescue more difficult, so redundancy and preparation are key. Here’s how to ensure you stay connected and safe:
Devices for Communication and Navigation
1. Mobile Phone:
- Pros:
- Lightweight, familiar, and capable of voice calls, texts, and GPS navigation.
- Useful for checking weather updates and emergency alerts.
- Cons:
- Limited by cell coverage, which is often poor or nonexistent in remote areas.
- Batteries drain quickly in cold temperatures.
- Tips:
- Keep your phone warm (in an inner pocket or sleeping bag).
- Carry a portable power bank or spare battery.
- Use airplane mode to conserve battery when not in use.
2. GPS Device:
- Pros:
- Dedicated GPS units are more reliable for navigation than phones, especially in areas without cell service.
- Many models are rugged and weather-resistant.
- Cons:
- Still require batteries, which can be affected by cold.
- Tips:
- Bring extra batteries and keep them warm.
- Learn to use your GPS before your trip.
3. Satellite Communicator or Personal Locator Beacon (PLB):
- Pros:
- Work anywhere on the planet, regardless of cell coverage.
- Devices like Garmin inReach or SPOT allow two-way messaging, location sharing, and SOS signaling.
- PLBs send a distress signal with your location to emergency services.
- Cons:
- Require a subscription (for communicators) and initial investment.
- Tips:
- Register your device and test it before your trip.
- Keep it accessible, not buried deep in your pack.
Informing Others of Your Plans
- Leave a Trip Plan:
- Before you leave, give a trusted friend or family member a detailed itinerary, including your planned route, campsites, group members, and expected return date and time.
- Include backup plans and alternate routes if you might change your itinerary.
- Check-In Procedures:
- Arrange regular check-ins if possible (e.g., daily texts or satellite messages).
- Set a “panic time”—a specific time after which your contact should alert authorities if they haven’t heard from you.
Redundancy and Backup
- Multiple Devices:
- Don’t rely on a single device. Bring at least two means of communication (e.g., phone and satellite communicator).
- Traditional Navigation:
- Always carry a map and compass as a backup to electronic devices, and know how to use them.
Emergency Communication Tips
- Conserve Power:
- Turn off devices or use battery-saving modes when not in use.
- Store electronics and batteries in insulated pockets close to your body.
- Signal for Help:
- In addition to electronic devices, carry a whistle, signal mirror, or brightly colored cloth for attracting attention if needed.
- Know Emergency Numbers:
- Save local emergency numbers in your phone and write them down in your gear.
Reliable communication is essential for winter camping safety. Bring a fully charged phone, GPS, and/or satellite communicator, and keep them protected from the cold. Always inform someone of your detailed itinerary and expected return, and have backup methods for signaling and navigation. These steps ensure that, even in the harshest winter conditions, you can call for help and increase your chances of a safe return.
8. Navigation and Daylight
Shorter Days
Winter’s shorter days and longer nights present unique challenges for outdoor activities. Limited daylight affects everything from route planning to safety, and being caught out after dark in cold conditions can quickly become dangerous. Careful planning and the right equipment are essential for making the most of available light and ensuring a safe return to camp.
Understanding Daylight Limitations
- Reduced Daylight Hours: In many regions, winter days may offer as little as 6–9 hours of usable light. Twilight comes early, and darkness falls quickly, especially in valleys or dense forests.
- Impact on Activities: Shorter days mean less time for hiking, setting up camp, gathering firewood, or cooking. Tasks take longer in the cold and snow, so time management is critical.
Planning Your Day
- Start Early: Begin your day’s activities at first light to maximize daylight. This is especially important for longer hikes, setting up camp, or melting snow for water.
- Set Turnaround Times: Decide in advance when you must turn back or stop for the day, regardless of your progress, to avoid traveling in the dark.
- Prioritize Tasks: Complete essential chores (like pitching your tent, collecting water, and preparing food) before dusk. Save non-essential activities for daylight hours.
Lighting: Headlamps and Batteries
- Headlamps: Always carry a reliable headlamp, even if you don’t plan to be out after dark. Headlamps free your hands for tasks like cooking, navigating, or setting up camp.
- Extra Batteries: Cold temperatures drain batteries quickly. Bring at least one set of spare batteries, and store them in an inner pocket close to your body to keep them warm.
- Battery Types: Lithium batteries perform better in cold than alkaline or rechargeable NiMH batteries.
- Backup Lights: Carry a backup flashlight or a second headlamp in case your primary light fails.
Navigating in Low Light
- Reflective Gear: Use reflective tape or gear to mark your tent, camp area, and key equipment, making them easier to find in the dark.
- Trail Markers: Mark your route with flagging tape or glow sticks if you expect to return after dark or in poor visibility.
- Map and Compass: Navigating by headlamp is challenging. Practice using your map and compass in low light, and keep them accessible.
Safety Considerations
- Avoid Night Travel: Traveling after dark increases the risk of getting lost, injured, or suffering from cold exposure. Only travel at night if absolutely necessary.
- Emergency Shelter: If you’re caught out after dark, be prepared to set up an emergency shelter and wait for daylight rather than risk navigation errors.
Short winter days require careful planning and preparation. Start activities early, prioritize essential tasks, and always carry reliable lighting with extra batteries. By respecting the limitations of daylight and preparing for darkness, you’ll reduce risks and make your winter camping experience safer and more enjoyable.
Navigation Tools
Navigating in winter is significantly more challenging than in other seasons. Snow can obscure trails, landmarks, and even signage, making it easy to lose your way. Whiteout conditions, low visibility, and early darkness further complicate route-finding. To stay safe and on course, it’s essential to bring multiple navigation tools—and, just as importantly, to know how to use them.
Why Navigation Is Harder in Winter
- Obscured Trails: Snow can completely cover established trails, trail markers, and cairns, making them invisible even to experienced hikers.
- Altered Landscapes: Snowdrifts, frozen lakes, and fallen trees can change the appearance of the terrain, making familiar areas look unfamiliar.
- Whiteouts and Low Visibility: Snowfall, fog, or blowing snow can reduce visibility to just a few feet, making it easy to become disoriented.
- Fewer Landmarks: Snow can bury rocks, logs, and other features you might use for navigation.
Essential Navigation Tools
1. Map (Topographic Map):
- Why Bring It: A detailed topographic map shows terrain features, elevation, water sources, and trails.
- How to Use:
- Learn to read contour lines, identify landmarks, and estimate distances.
- Waterproof your map with a case or laminate, as snow and moisture can quickly ruin paper maps.
- Mark your planned route and potential bailout points before your trip.
2. Compass:
- Why Bring It: A compass is reliable, doesn’t require batteries, and works in all weather conditions.
- How to Use:
- Practice taking bearings and orienting your map.
- Learn to triangulate your position using visible landmarks (when possible).
- Adjust for magnetic declination in your area.
3. GPS Device:
- Why Bring It: GPS units (or GPS-enabled smartphones) provide precise location data and can help you follow preloaded routes or waypoints.
- How to Use:
- Preload maps and routes before your trip.
- Carry spare batteries or a power bank, as cold drains batteries quickly.
- Don’t rely solely on GPS—electronics can fail in extreme cold or if dropped.
4. Altimeter:
- Why Bring It: An altimeter (standalone or built into a watch) helps you track elevation, which is useful for confirming your position on a topographic map.
- How to Use:
- Calibrate your altimeter at known elevations (such as trailheads or summits).
- Use elevation readings to cross-reference your location on the map.
Practical Tips for Winter Navigation
- Practice Before You Go: Familiarize yourself with your map, compass, and GPS at home or on short trips before relying on them in the backcountry.
- Mark Waypoints: Use your GPS to mark key locations (trailheads, campsites, water sources, bailout points) for easy reference.
- Track Your Progress: Regularly check your position against your map and GPS to ensure you’re on course.
- Leave a Track: In deep snow, consider using flagging tape or marking your route with ski or snowshoe tracks, but remember that wind and new snow can quickly erase these.
- Backup Navigation: Always have at least two navigation methods (e.g., map/compass and GPS) in case one fails.
Safety Considerations
- Group Awareness: Make sure everyone in your group knows the planned route and how to use the navigation tools.
- Emergency Plans: Identify safe bailout routes and shelters in advance in case you need to change plans due to weather or injury.
- Night Navigation: Navigating after dark is much harder—use reflective markers and headlamps, and avoid night travel if possible.
Winter navigation demands preparation, skill, and redundancy. Bring a topographic map, compass, and GPS, and ensure you’re proficient with each. By understanding the challenges of snow-covered terrain and using your tools effectively, you’ll greatly reduce the risk of getting lost and increase your safety and confidence in the winter wilderness.
Conclusion
Winter camping is a uniquely rewarding experience, offering solitude, pristine landscapes, and a sense of accomplishment that few other outdoor activities can match. However, the beauty and serenity of the winter wilderness come with significant risks and challenges. Success and safety in winter camping hinge on thorough preparation, respect for the environment, and a willingness to adapt to changing conditions.
The Importance of Careful Preparation
Every aspect of winter camping—from choosing your campsite to packing your gear—demands extra attention compared to warmer seasons. The margin for error is much smaller: a forgotten piece of equipment, a misjudged weather forecast, or a navigational mistake can quickly escalate into a dangerous situation. Careful planning allows you to anticipate and mitigate these risks, ensuring you have the right equipment, knowledge, and contingency plans in place.
Respecting the Elements
Winter’s elements are unforgiving. Cold, wind, snow, and limited daylight can sap your energy and test your resolve. Respecting these forces means:
- Monitoring Weather: Staying informed about current and forecasted conditions, and being ready to change plans if necessary.
- Dressing Appropriately: Using a proven layering system and quality accessories to protect against hypothermia and frostbite.
- Choosing the Right Shelter: Selecting a four-season tent or properly insulated hammock setup to withstand snow and wind, and ensuring adequate ventilation to prevent condensation.
Key Areas of Focus
- Location: Select campsites that are accessible, safe from natural hazards, and minimize environmental impact.
- Clothing and Gear: Invest in high-quality, winter-appropriate clothing, sleeping bags, and pads. Bring extras in case items get wet.
- Food and Hydration: Plan for calorie-dense, hot meals and reliable water management strategies to maintain energy and warmth.
- Fire and Cooking: Use stoves and fire-starting methods that work in freezing temperatures, and always practice fire safety and Leave No Trace principles.
- Safety and Emergency Preparedness: Carry a comprehensive first aid kit, emergency shelter, and signaling devices. Know basic winter first aid and have a communication plan.
- Navigation: Bring and know how to use a map, compass, and GPS. Plan routes with daylight in mind and be prepared for snow-obscured trails.
The Rewards of Winter Camping
With the right preparation and mindset, winter camping can be an unforgettable adventure. The quiet of a snow-covered forest, the brilliance of a star-filled winter sky, and the satisfaction of overcoming challenges all contribute to a deeply fulfilling experience. You’ll develop resilience, self-reliance, and a greater appreciation for the natural world.
Final Thoughts
Winter camping is not just about enduring the cold—it’s about embracing the season’s unique beauty and challenges. By respecting the elements, planning meticulously, and prioritizing safety, you can transform a potentially hazardous environment into a playground for exploration and personal growth. With each trip, your skills and confidence will grow, opening up new possibilities for adventure in the winter wilderness.


Leave a Reply