
Winter camping offers a unique and rewarding experience, but it also presents distinct challenges. Proper preparation is essential to ensure safety, comfort, and enjoyment. This guide outlines the key steps to get ready for the winter camping season.
1. Research and Planning
1.1. Choose Your Destination Wisely
Selecting the right destination is the foundation of a successful winter camping trip. Unlike summer camping, winter conditions introduce additional risks and logistical challenges, so careful consideration is crucial.
Assess Accessibility
- Road Conditions: Many campsites become inaccessible due to snow or ice. Research whether roads are plowed and if you’ll need a four-wheel-drive vehicle or snow chains.
- Trail Access: Some trails may be closed or unmaintained in winter. Check with local park authorities or ranger stations for up-to-date information.
- Parking: Ensure there is safe, legal parking near your intended trailhead or campsite, and that your vehicle won’t be blocked by snowplows.
Evaluate Terrain
- Elevation: Higher elevations are colder and may have deeper snow. Consider your experience level and physical fitness when choosing a site.
- Shelter from Elements: Look for areas naturally protected from wind, such as behind tree lines or rock formations. Avoid valleys where cold air settles or ridges exposed to harsh winds.
- Avalanche Risk: In mountainous regions, research avalanche forecasts and avoid known avalanche paths. Use resources like local avalanche centers and maps.
Proximity to Emergency Services
- Distance from Help: The further you are from roads or ranger stations, the longer it will take for help to arrive in an emergency. Beginners should choose sites closer to civilization.
- Cell Coverage: Don’t assume you’ll have cell service. Check coverage maps and consider bringing a satellite communicator for remote areas.
- Emergency Exits: Identify alternate routes out of your campsite in case of sudden weather changes or emergencies.
Check Regulations and Safety
- Permits and Restrictions: Some parks require permits for winter camping or have seasonal restrictions. Apply for permits in advance and familiarize yourself with local rules.
- Wildlife Activity: While some animals hibernate, others remain active. Research wildlife in the area and proper food storage techniques.
- Open and Safe: Confirm that your chosen area is officially open for winter camping and that there are no current advisories or closures due to weather, wildlife, or other hazards.
Leverage Local Knowledge
- Contact Rangers: Park rangers and local outdoor organizations are invaluable sources of current information about conditions, hazards, and recommendations.
- Trip Reports: Read recent trip reports from other campers to learn about trail conditions, snow depth, and any unexpected challenges.
By thoroughly researching and planning your destination, you lay the groundwork for a safe, enjoyable, and memorable winter camping adventure.
1.2. Monitor Weather Conditions
Monitoring weather conditions is one of the most critical aspects of winter camping preparation. The winter environment is dynamic and can change rapidly, turning a pleasant outing into a hazardous situation if you are unprepared.
Check Multiple Forecast Sources
- Reliable Weather Services: Use reputable sources such as the National Weather Service, Environment Canada, or local meteorological agencies for up-to-date forecasts.
- Mountain-Specific Forecasts: If camping in mountainous regions, consult specialized mountain weather forecasts, which provide more accurate information about temperature, wind, and precipitation at higher elevations.
- Short- and Long-Term Outlooks: Review both the immediate forecast and the extended outlook to anticipate any approaching weather systems.
Understand Key Weather Factors
- Temperature: Know the expected daytime highs and nighttime lows. Extreme cold can lead to hypothermia or frostbite if you’re not properly equipped.
- Wind Chill: Wind can make temperatures feel much colder than they are. High winds also increase the risk of tent failure and make fire-starting more difficult.
- Precipitation: Snowfall can obscure trails, increase avalanche risk, and make travel more strenuous. Freezing rain or sleet can create dangerous ice.
- Storms: Be alert for incoming blizzards or winter storms, which can reduce visibility, block access roads, and trap campers.
Plan Around Stable Weather Windows
- Timing: Schedule your trip during periods of stable, mild weather whenever possible. Avoid going out if a storm is forecasted or if temperatures are expected to drop dangerously low.
- Flexibility: Build flexibility into your plans. Be prepared to delay, shorten, or cancel your trip if the weather turns unfavorable.
- Daylight Hours: Winter days are short. Plan your travel and camp setup to maximize available daylight and avoid being caught out after dark.
Prepare for Sudden Changes
- Rapid Shifts: Mountain and northern climates can experience sudden weather changes. Always be prepared for conditions to worsen unexpectedly.
- Backup Plans: Have contingency plans for shelter, evacuation, or hunkering down if you are caught in a storm.
Use Technology and Tools
- Weather Apps: Download weather apps that provide real-time updates and alerts for your specific location.
- Satellite Communicators: In remote areas, devices like satellite messengers can receive weather updates even without cell service.
Observe On-the-Ground Signs
- Cloud Formations: Learn to recognize cloud patterns that signal changing weather, such as thickening clouds or rapidly dropping temperatures.
- Wind Direction: Shifts in wind can indicate approaching fronts or storms.
By diligently monitoring weather conditions before and during your trip, you can make informed decisions, avoid dangerous situations, and ensure a safer, more enjoyable winter camping experience.
1.3. Inform Others
Informing others about your winter camping plans is a crucial safety step that is often overlooked. In the event of an emergency, having someone aware of your whereabouts and schedule can make the difference between a timely rescue and a dangerous situation.
Share Your Itinerary
- Detailed Route: Provide a trusted friend or family member with a detailed description of your planned route, including trailheads, campsites, and any alternate routes you might take.
- Timeline: Specify your expected departure and return times, as well as key checkpoints along the way.
- Group Information: List the names and contact information of everyone in your group.
Establish Check-In Procedures
- Regular Updates: Arrange to check in at predetermined times, if possible, especially if you have cell service or a satellite device.
- Emergency Protocol: Make sure your contact knows what to do if you miss a check-in or do not return on time, including who to call and what information to provide to search and rescue teams.
Use Technology for Added Safety
- GPS Beacons: Devices like Personal Locator Beacons (PLBs) or satellite messengers (e.g., Garmin inReach, SPOT) allow you to send your location and emergency signals even when out of cell range.
- Tracking Features: Many satellite communicators offer real-time tracking, so your contacts can monitor your progress and location.
- Pre-Programmed Messages: Some devices allow you to send pre-set “I’m OK” or “Delayed but Safe” messages, reducing worry for those at home.
Leave Information at the Trailhead
- Written Note: In addition to informing someone at home, consider leaving a written note in your vehicle at the trailhead with your planned route and expected return time. This can assist rescuers if needed.
Consider Local Authorities
- Ranger Stations: In some remote or high-risk areas, it’s wise to check in with local ranger stations or park offices. They can provide additional safety tips and will be aware of your presence in the area.
By thoroughly informing others of your plans and using available technology, you greatly increase your safety margin. Should anything go wrong, rescuers will have the information they need to find you quickly, ensuring a safer and more confident winter camping experience.
2. Gear and Equipment
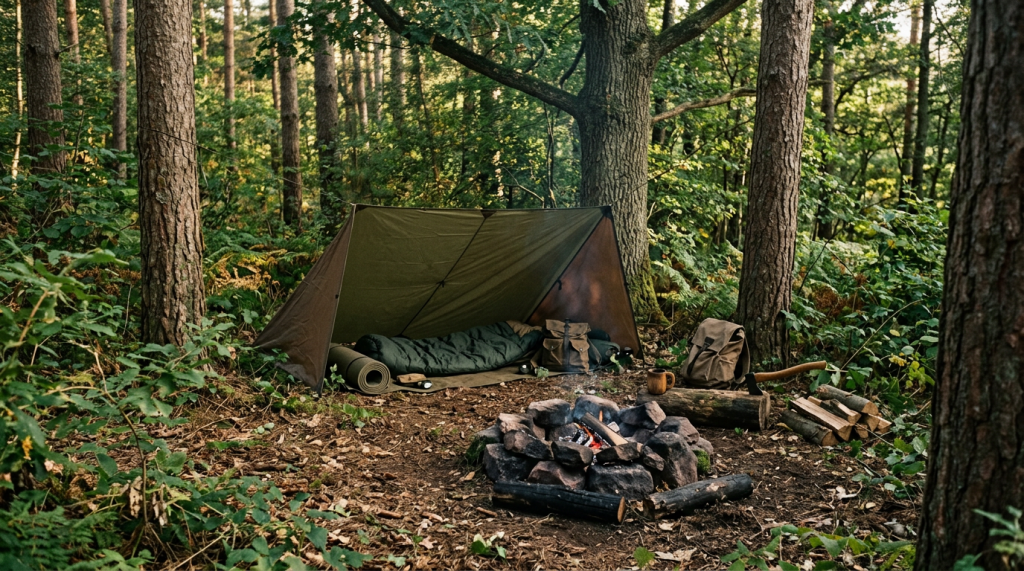
2.1. Shelter
A reliable shelter is the cornerstone of winter camping safety and comfort. The right setup protects you from wind, snow, and freezing temperatures, helping to prevent hypothermia and ensuring restful sleep.
Four-Season Tent
- Design and Durability: Four-season tents are engineered to withstand harsh winter conditions. They feature stronger poles, reinforced fabrics, and a shape (often dome or geodesic) that sheds snow and resists wind.
- Ventilation: Proper ventilation is crucial to reduce condensation inside the tent. Look for tents with adjustable vents and double-wall construction to manage moisture while retaining warmth.
- Space Considerations: Winter gear is bulkier, so choose a tent with enough interior space for you, your companions, and your equipment. Vestibules are useful for storing boots and packs out of the weather.
Ground Tarp (Footprint)
- Moisture Barrier: A durable ground tarp or footprint beneath your tent acts as a barrier against moisture from melting snow, keeping the tent floor dry.
- Insulation: It adds an extra layer of insulation from the cold ground, helping to retain heat inside the tent.
- Protection: The tarp protects the tent floor from abrasion and punctures caused by ice, rocks, or sticks hidden under the snow.
Snow Stakes and Anchoring
- Snow Stakes: Standard tent stakes often fail in snow. Snow stakes (wide, flat, and sometimes perforated) are designed to grip snow securely. Bury them horizontally or use the “deadman” technique for maximum hold.
- Alternative Anchors: In deep snow, you can use stuff sacks filled with snow, sticks, or even skis and snowshoes as anchors.
- Wind Protection: Secure anchoring is vital in winter winds. Double-check all guy lines and stake points, and reinforce them as needed.
Additional Shelter Tips
- Site Selection: Choose a sheltered spot, such as behind a natural windbreak (trees or rocks), but avoid areas where snow could drift or accumulate heavily.
- Snow Walls: In exposed areas, build a low snow wall around your tent to block wind and reduce drifting snow.
- Tent Maintenance: Regularly clear snow from the tent roof to prevent collapse and maintain structural integrity.
By investing in a robust shelter system and learning how to set it up effectively in winter conditions, you create a safe haven that is essential for a successful and enjoyable winter camping experience.
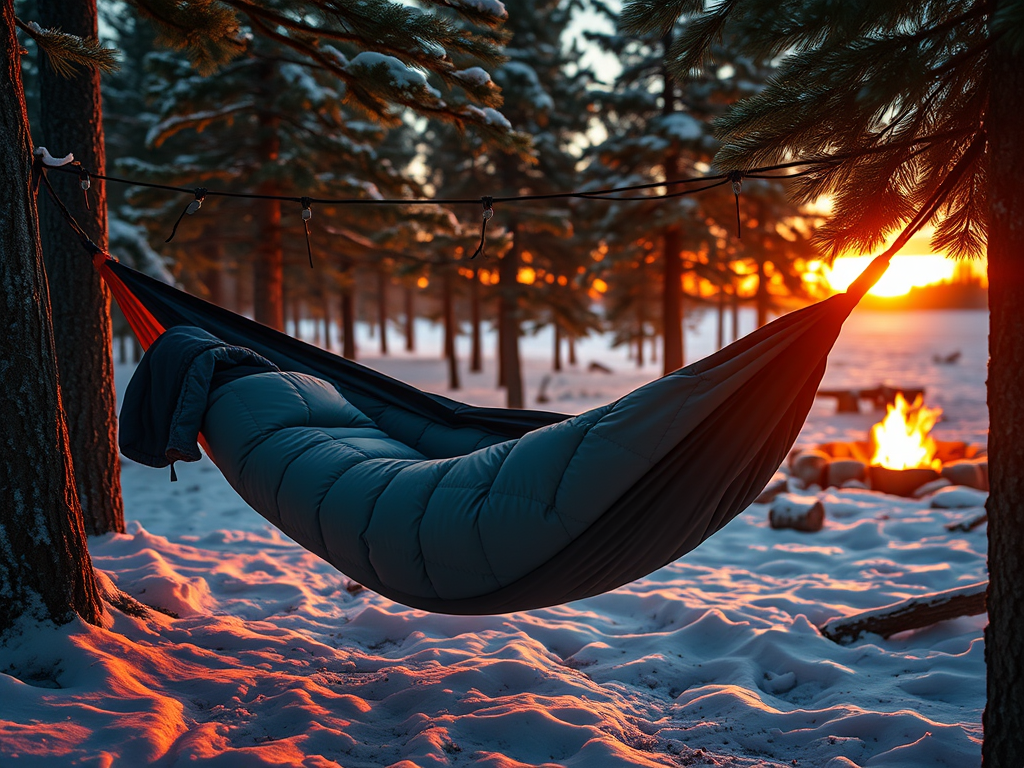
2.1a. Hammock Camping in Winter
Hammock camping can be a comfortable and versatile alternative to tent camping, even in winter. However, it requires specialized gear and careful setup to ensure warmth and safety in cold, snowy conditions.
Choosing the Right Hammock
- Four-Season Hammock: Select a hammock designed for cold weather, with robust materials and integrated bug nets or weather covers for added protection.
- Weight Capacity: Ensure your hammock can support your weight plus winter gear, which is often heavier and bulkier.
Insulation Systems
- Underquilt: Unlike tents, hammocks expose your underside to cold air. An underquilt—an insulated blanket that hangs beneath the hammock—prevents heat loss and is essential for winter use.
- Top Quilt or Sleeping Bag: Use a high-quality top quilt or a sleeping bag rated for sub-freezing temperatures. Mummy-style sleeping bags work well for retaining warmth.
- Sleeping Pad: For extra insulation, place a closed-cell foam or inflatable sleeping pad inside the hammock. This adds a barrier against cold air and increases comfort.
Weather Protection
- Tarp or Rainfly: A large, four-season tarp is crucial for shielding your hammock from snow, wind, and rain. Set it up with steep sides to shed snow and prevent accumulation.
- Drip Lines: Attach drip lines to your suspension to prevent water or melting snow from running down into your hammock.
- Wind Protection: Set up your hammock in a sheltered area, such as behind trees or natural windbreaks, to minimize wind chill.
Suspension and Anchoring
- Tree Straps: Use wide, strong tree straps to protect tree bark and ensure a secure hold, even in icy conditions.
- Anchor Points: Choose healthy, sturdy trees spaced 12–15 feet apart. Avoid dead or damaged trees, which may be unstable under snow load.
Site Selection and Setup
- Avoid Snow Accumulation: Hang your hammock above deep snow, but ensure you can safely get in and out. Clear snow from your landing area to prevent slipping.
- Height: Hang your hammock slightly lower than usual, as insulation and gear will compress and you may sink lower during the night.
- Safety: Never hang your hammock higher than you’re willing to fall, especially on icy or uneven ground.
Additional Tips
- Gear Storage: Use a gear sling or hang your backpack from the suspension system to keep it off the snow.
- Ventilation: Ensure your tarp setup allows for some airflow to reduce condensation inside your hammock.
- Practice: Test your winter hammock setup at home or on short trips before venturing into remote areas.
With the right gear and preparation, hammock camping can be a warm, comfortable, and enjoyable way to experience the winter wilderness, offering unique advantages such as flexibility in site selection and reduced ground impact.
2.2. Sleeping System
A well-designed sleeping system is essential for staying warm, safe, and comfortable during winter camping. Cold nights can quickly sap body heat, so your sleep setup must provide effective insulation from both the air and the ground (or, in the case of hammocks, the air below).
Sleeping Bag or Topquilt
- Temperature Rating: Choose a sleeping bag or topquilt rated for temperatures at least 5–10°C (10–20°F) colder than the lowest temperature you expect. Manufacturers’ ratings often assume you’re wearing thermal layers and using a quality sleeping pad.
- Down vs. Synthetic: Down sleeping bags are lighter and more compressible, offering excellent warmth-to-weight ratio, but lose insulating power when wet. Synthetic bags are bulkier but retain warmth even if damp.
- Shape: Mummy-shaped bags are best for winter, as they minimize dead air space and have hoods to trap heat. Topquilts, popular with hammock campers, are lighter and designed to pair with underquilts for full insulation.
- Draft Collars and Zipper Baffles: Look for bags with draft collars and insulated zipper baffles to prevent cold air from seeping in.
Insulated Sleeping Pad or Underquilt
- Ground Insulation: Most heat loss occurs to the ground. Use an insulated sleeping pad with a high R-value (4 or higher for winter). Closed-cell foam pads can be layered with inflatable pads for extra warmth and redundancy.
- Hammock Insulation: In a hammock, use an underquilt—an insulated blanket that hangs beneath the hammock to trap warm air and block cold wind. Pair with a topquilt or sleeping bag for full coverage.
- Double Up: In extreme cold, use two pads (foam plus inflatable) or combine an underquilt with a sleeping pad for maximum insulation.
Additional Tips for Warmth
- Sleeping Bag Liner: Add a liner to boost warmth by several degrees and keep your bag cleaner.
- Clothing: Wear dry, thermal base layers, warm socks, and a hat to bed. Avoid overdressing, as sweating can dampen insulation.
- Hot Water Bottle: Fill a sturdy water bottle with hot water and place it in your bag to pre-warm your sleeping space.
- Ventilation: Prevent condensation by ventilating your tent or tarp setup, but avoid drafts directly on your sleeping area.
- Keep Gear Dry: Store your sleeping bag and insulation in waterproof stuff sacks during the day.
Testing and Practice
- Test at Home: Try your sleeping system in your backyard or on a short trip before heading into remote areas.
- Know Your Limits: If you tend to sleep cold, choose gear rated for even lower temperatures.
A carefully chosen and well-layered sleeping system is your best defense against the cold. By combining a quality sleeping bag or topquilt with effective ground or under-hammock insulation, you’ll ensure restful, safe nights—even in the harshest winter conditions.
2.3. Clothing
Proper clothing is your first and most important defense against the cold, wet, and windy conditions of winter camping. The right layering system keeps you warm, dry, and comfortable, while allowing you to adapt to changing activity levels and weather.
The Layering System
1. Base Layer (Moisture-Wicking)
- Purpose: Worn next to your skin, the base layer’s main job is to wick sweat away, keeping you dry and reducing the risk of chilling.
- Materials: Choose synthetic fabrics (like polyester or polypropylene) or natural fibers such as merino wool. Both dry quickly and retain warmth even when damp.
- Avoid: Cotton, as it absorbs moisture, dries slowly, and loses all insulating value when wet.
- Examples: Long underwear tops and bottoms, liner socks.
2. Mid Layer (Insulation)
- Purpose: The mid layer traps body heat to keep you warm.
- Materials: Fleece, wool, or lightweight down/synthetic insulated jackets are excellent choices. Fleece is breathable and dries quickly, while down offers the best warmth-to-weight ratio (but must be kept dry).
- Adjustability: You may need multiple mid layers for very cold conditions—add or remove as needed to regulate warmth.
- Examples: Fleece jackets, wool sweaters, insulated vests, puffy jackets.
3. Outer Layer (Shell)
- Purpose: The shell protects you from wind, snow, and rain, while allowing moisture to escape.
- Materials: Waterproof and breathable fabrics like Gore-Tex or similar membranes are ideal. For less extreme conditions, a water-resistant soft shell may suffice.
- Features: Look for adjustable hoods, cuffs, and ventilation zippers (pit zips) to help regulate temperature and moisture.
- Examples: Hard shell jackets and pants, rain pants, windbreakers.
Extremities: Head, Hands, and Feet
- Hat: A warm, insulated hat or beanie is essential, as a significant amount of heat is lost through the head. Consider a balaclava or neck gaiter for extra protection.
- Gloves/Mittens: Layering works here too—use a thin liner glove under an insulated, waterproof mitten or glove. Mittens are warmer than gloves but offer less dexterity.
- Socks: Wear moisture-wicking liner socks under thick wool or synthetic socks. Bring extra pairs to change into dry socks at night or if your feet get wet.
- Gaiters: Waterproof gaiters keep snow out of your boots and add warmth to your lower legs.
- Boots: Insulated, waterproof boots are a must. Make sure they fit well with your sock system and allow room for toe movement.
Additional Clothing Tips
- Layer Management: Add or remove layers as your activity level changes to avoid sweating (which can lead to chilling later).
- Ventilation: Use zippers and vents to release excess heat and moisture during strenuous activity.
- Dry Clothes: Always keep a set of dry clothes for sleeping. Store them in a waterproof bag.
- Spare Items: Pack extra hats, gloves, and socks—these are the most likely to get wet or lost.
- Hand and Foot Warmers: Chemical warmers can provide extra heat in extreme cold.
By carefully selecting and managing your clothing layers, you’ll stay warm, dry, and comfortable throughout your winter camping adventure, no matter how harsh the conditions become.
2.4. Cooking and Hydration
Proper nutrition and hydration are vital for maintaining energy, warmth, and safety during winter camping. Cold temperatures present unique challenges for both cooking and water sourcing, so careful planning and the right equipment are essential.
Cooking in Cold Conditions
- Stove Selection:
- Liquid Fuel Stoves: These are the most reliable in freezing temperatures. Unlike canister stoves, liquid fuel stoves (such as white gas models) perform consistently in the cold and can be easily maintained in the field.
- Canister Stoves: Standard canister stoves often struggle below freezing, as the fuel can lose pressure. If you use one, choose a model designed for cold weather and keep the canister warm (e.g., in your jacket).
- Wood Stoves: Not recommended for deep winter, as dry fuel can be hard to find and snow can make fire-starting difficult.
- Wind Protection:
- Always use a windscreen with your stove to conserve fuel and speed up cooking times.
- Set up your cooking area in a sheltered spot, away from blowing snow and wind.
- Fuel Needs:
- You’ll burn more fuel in winter, both for cooking and melting snow for water. Bring extra fuel—plan for at least twice as much as you’d use in summer.
- Cooking Tips:
- Choose meals that are quick and easy to prepare, as standing around in the cold is uncomfortable and can lead to heat loss.
- Pre-packaged freeze-dried meals, instant soups, and oatmeal are excellent choices.
- Pre-chop and portion ingredients at home to minimize prep time at camp.
- Keep utensils and pots simple and easy to clean, as water for washing is limited.
Hydration in Winter
- Water Sources:
- Streams and lakes may be frozen or inaccessible. Melting snow is often the most reliable source of water.
- Always use clean, fresh snow—avoid yellow or dirty snow.
- Melting Snow:
- Use your stove to melt snow in a large pot. Start with a small amount of water in the pot to prevent scorching and speed up the process.
- Melting snow is fuel-intensive, so plan accordingly.
- Purification:
- Boil melted snow for at least one minute to ensure it’s safe to drink.
- Alternatively, use a water filter or chemical treatment, but note that some filters can freeze and become ineffective.
- Preventing Frozen Water:
- Store water bottles upside down (ice forms at the top first).
- Use insulated covers or keep bottles in your sleeping bag overnight.
- Avoid hydration bladders, as hoses and bite valves freeze quickly.
Nutrition for Cold Weather
- High-Calorie Foods:
- Your body burns more calories in cold weather to stay warm. Pack calorie-dense foods: nuts, cheese, chocolate, nut butters, and energy bars.
- Include both carbohydrates (for quick energy) and fats/proteins (for sustained warmth).
- Snacking:
- Eat small, frequent snacks throughout the day to maintain energy and body heat.
- Keep snacks accessible in your pockets to avoid stopping and exposing yourself to the cold.
- Hot Drinks:
- Hot beverages like tea, cocoa, or broth provide warmth and comfort. They also encourage you to stay hydrated.
By planning your cooking and hydration systems for winter conditions, you’ll stay nourished, hydrated, and warm—key factors for a safe and enjoyable winter camping experience.
2.5. Safety and Emergency Gear
Winter camping environments are inherently more hazardous than their summer counterparts. Cold, snow, and isolation mean that being prepared for emergencies is not optional—it’s essential. The right safety and emergency gear can make the difference between a minor inconvenience and a life-threatening situation.
First Aid Kit
- Comprehensive Contents: Your kit should include bandages, gauze, antiseptic wipes, blister treatment, pain relievers, tweezers, medical tape, and any personal medications.
- Cold-Specific Supplies: Add items for frostbite and hypothermia treatment, such as chemical heat packs, space blankets, and extra dry socks.
- Knowledge: Know how to use everything in your kit. Consider taking a wilderness first aid course.
Illumination
- Headlamp: Essential for hands-free operation in the dark, especially since winter days are short and nights are long.
- Extra Batteries: Cold drains batteries quickly. Store spares in an inner pocket close to your body to keep them warm.
- Backup Light: Carry a small backup flashlight or another headlamp in case your primary fails.
Fire-Starting Materials
- Multiple Methods: Bring waterproof matches, a reliable lighter, and a fire steel or magnesium striker.
- Tinder: Pack fire starters such as cotton balls soaked in petroleum jelly, commercial fire cubes, or dryer lint in a waterproof container.
- Redundancy: Always have at least two independent ways to start a fire.
Multi-Tool or Knife
- Versatility: A multi-tool or sturdy knife is invaluable for repairs, food prep, first aid, and emergency situations.
- Features: Look for tools with pliers, scissors, screwdrivers, and a saw blade for cutting wood or ice.
Shovel
- Compact Snow Shovel: Essential for digging out tents, building snow walls, creating emergency shelters, or rescuing someone from an avalanche.
- Material: Choose a lightweight but durable shovel, preferably with a collapsible handle for easy packing.
Avalanche Safety Gear (for Mountainous or Avalanche-Prone Areas)
- Avalanche Beacon (Transceiver): Allows rescuers to locate you if you’re buried in an avalanche. Everyone in your group should carry one and know how to use it.
- Probe: Used to pinpoint the location and depth of a buried person after a beacon search.
- Shovel: As above, for digging out avalanche victims.
- Avalanche Airbag Pack (Optional): Can help keep you on the surface of a moving avalanche.
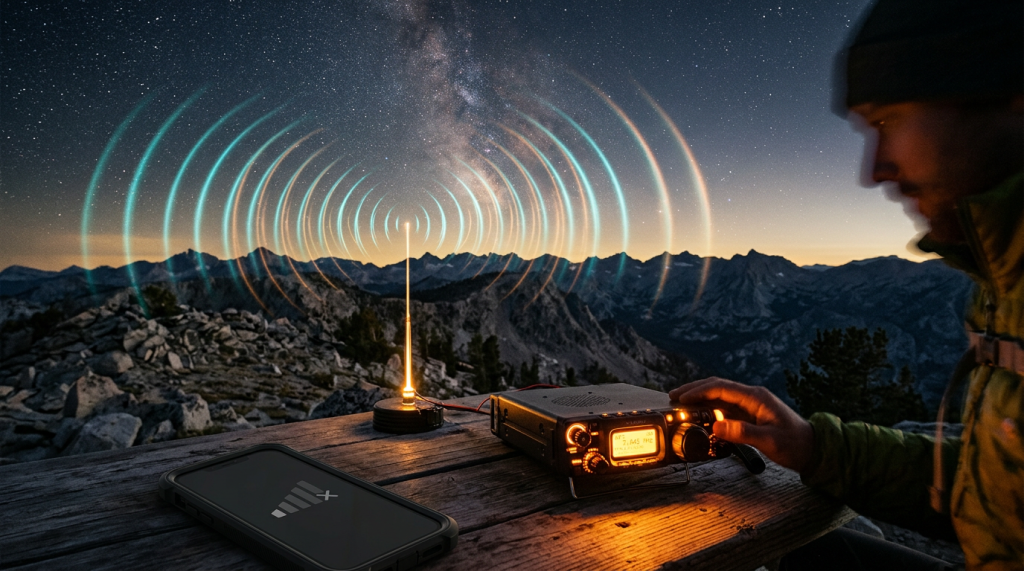
Navigation and Communication
- Map and Compass: Don’t rely solely on electronics; batteries can die in the cold.
- GPS Device: Useful for precise navigation, but bring extra batteries.
- Satellite Communicator or Personal Locator Beacon (PLB): Critical for calling for help in remote areas without cell service.
Shelter and Warmth
- Emergency Blanket or Bivy Sack: Lightweight and compact, these can provide life-saving warmth if you’re stranded or injured.
- Extra Insulation: Pack an extra hat, gloves, and socks in a waterproof bag.
Whistle and Signal Mirror
- Whistle: For signaling your location to rescuers—three blasts is the universal distress signal.
- Signal Mirror: Can be used to attract attention from a distance during daylight.
Additional Tips
- Group Gear: Distribute emergency gear among group members to avoid losing everything if a pack is lost.
- Practice: Know how to use all your emergency equipment before your trip.
- Checklists: Use a checklist to ensure you don’t forget critical items.
By assembling a comprehensive safety and emergency kit and knowing how to use each item, you significantly increase your chances of handling unexpected situations and ensuring a safe winter camping experience.
3. Skills and Preparation
3.1. Practice Setting Up Camp
Preparation is not just about having the right gear—it’s about knowing how to use it efficiently, especially when conditions are challenging. Practicing your camp setup before your winter trip is essential for safety, comfort, and confidence.
Pitching Your Tent or Hammock
- Cold-Weather Setup: Practice setting up your tent or hammock while wearing gloves or mittens, as dexterity is reduced in the cold. Learn how to handle zippers, buckles, and guy lines with numb fingers.
- Snow Anchoring: Experiment with snow stakes, deadman anchors, or alternative anchoring methods in your backyard or a local park. Learn how to build snow walls or windbreaks for extra protection.
- Site Selection: Practice identifying sheltered spots, avoiding low-lying areas where cold air settles or places where snow could drift or accumulate.
Stove and Cooking System
- Cold Starts: Test your stove in freezing temperatures to ensure it works reliably. Liquid fuel stoves may require priming, and canister stoves may need to be warmed.
- Fuel Management: Practice estimating and measuring fuel usage for both cooking and melting snow. Learn how to safely refuel and operate your stove with gloves on.
- Wind Protection: Set up wind screens and learn how to cook efficiently in breezy or snowy conditions.
Sleeping System
- Layering and Packing: Practice assembling your sleeping system—sleeping bag, pads, liners, and bivy sacks—quickly and efficiently. Try setting up your sleep system in the dark or with limited visibility.
- Condensation Management: Learn how to ventilate your tent or tarp to minimize condensation, which can dampen insulation and reduce warmth.
Packing and Organization
- Efficient Packing: Practice packing and unpacking your gear so you know where everything is, even in low light or when you’re tired.
- Waterproofing: Test your methods for keeping gear dry, such as using dry bags, pack liners, or waterproof stuff sacks.
Emergency Drills
- Quick Shelter: Practice setting up an emergency shelter (tent, tarp, or bivy) rapidly in case of sudden weather changes.
- Fire Starting: Try starting a fire with gloves on, using different fire-starting materials and methods.
Time Management
- Daylight Awareness: Practice setting up and breaking down camp quickly to maximize limited winter daylight hours.
- Routine: Develop a routine for camp setup, cooking, and sleeping so you can operate efficiently and safely in the cold.
By practicing your camp setup and essential skills before heading into the winter wilderness, you’ll be better prepared to handle the challenges of cold, wind, and snow. This preparation builds confidence, reduces stress, and ensures a safer, more enjoyable winter camping experience.
3.2. Learn Winter Survival Skills
Winter camping demands a unique set of survival skills to ensure safety and resilience in harsh, unpredictable conditions. Mastering these skills can mean the difference between a minor inconvenience and a life-threatening emergency.
Building a Snow Shelter
- Types of Snow Shelters: Learn to construct different types of shelters, such as a quinzee (a hollowed-out mound of compacted snow), snow cave, or simple trench shelter. Each has its own advantages depending on snow conditions and available time.
- Site Selection: Choose a safe location away from avalanche paths, tree wells, and overhanging branches. Avoid areas where snow could collapse or where water might pool if temperatures rise.
- Construction Tips:
- For a quinzee, pile snow into a mound and let it settle for at least an hour before hollowing it out.
- For a snow cave, dig horizontally into a drift or bank, creating a small entrance and a raised sleeping platform to trap warm air.
- Always create a ventilation hole to prevent carbon dioxide buildup.
- Insulation: Use pine boughs, a sleeping pad, or extra clothing to insulate the floor and walls, reducing heat loss to the snow.
Starting a Fire in Wet or Snowy Conditions
- Fire-Starting Materials: Carry multiple ignition sources—waterproof matches, lighters, and a fire steel. Pack reliable tinder such as cotton balls with petroleum jelly, commercial fire starters, or dry birch bark.
- Finding Dry Fuel: Look for dead branches still attached to trees, as these are less likely to be soaked. Split larger logs to access dry wood inside.
- Fire Building Techniques:
- Build a platform of sticks or bark to keep your fire off the snow or wet ground.
- Use the “teepee” or “log cabin” method to allow airflow and encourage a strong flame.
- Start small, gradually adding larger pieces as the fire grows.
- Wind and Snow Protection: Shield your fire from wind and falling snow using rocks, a snow wall, or your pack.
Recognizing and Responding to Hypothermia
- Early Signs: Shivering, slurred speech, clumsiness, confusion, and fatigue.
- Progression: As hypothermia worsens, shivering may stop, and the person may become unresponsive or irrational.
- Prevention: Stay dry, dress in layers, eat and drink regularly, and avoid exhaustion.
- Treatment: Move the person to shelter, remove wet clothing, insulate with dry layers and sleeping bags, and provide warm (not hot) fluids if conscious. Seek medical help as soon as possible.
Recognizing and Responding to Frostbite
- Early Signs: Numbness, tingling, or a “pins and needles” sensation in extremities (fingers, toes, nose, ears), followed by pale, hard, or waxy skin.
- Progression: Skin may turn blue or black in severe cases, and blisters may form.
- Prevention: Keep extremities covered, avoid tight boots or gloves, and change out of wet clothing promptly.
- Treatment: Move to a warm area, gently rewarm affected areas with body heat or warm (not hot) water, and avoid rubbing or massaging the skin. Do not walk on frostbitten feet if possible. Seek medical attention immediately.
Additional Survival Skills
- Navigation: Know how to use a map and compass, as GPS devices can fail in cold or snowy conditions.
- Signaling for Help: Carry a whistle and signal mirror, and know how to use them to attract rescuers.
- Water Procurement: Learn to melt and purify snow for drinking water safely.
By developing and practicing these winter survival skills, you’ll be prepared to handle emergencies, adapt to changing conditions, and ensure your safety and well-being in the winter wilderness.
3.3. Physical Preparation
Winter camping is far more physically demanding than camping in milder seasons. Cold temperatures, deep snow, heavy gear, and challenging terrain all require a higher level of fitness and stamina. Preparing your body in advance will help you stay safe, comfortable, and able to enjoy your adventure.
Build Cardiovascular Endurance
- Why It Matters: Hiking through snow, especially with a loaded pack, is strenuous and can quickly elevate your heart rate.
- How to Train: Engage in regular aerobic activities such as brisk walking, running, cycling, swimming, or stair climbing. Aim for at least 30–45 minutes, 3–5 times per week.
- Simulate Conditions: If possible, hike on trails with elevation gain or in snowy conditions while wearing a backpack to mimic the demands of winter camping.
Increase Strength and Core Stability
- Why It Matters: Carrying heavy gear, setting up camp in snow, and moving through uneven terrain require strong muscles and a stable core.
- How to Train: Incorporate strength training exercises 2–3 times per week. Focus on:
- Legs: Squats, lunges, step-ups, and calf raises.
- Core: Planks, Russian twists, and mountain climbers.
- Upper Body: Push-ups, pull-ups, rows, and shoulder presses.
- Functional Movements: Practice lifting and carrying weighted objects to simulate handling your pack and gear.
Improve Balance and Flexibility
- Why It Matters: Snow and ice make footing unpredictable. Good balance and flexibility help prevent falls and injuries.
- How to Train: Add balance exercises (such as single-leg stands or using a balance board) and flexibility routines (like yoga or dynamic stretching) to your workouts.
Acclimate to Cold Weather
- Why It Matters: Your body needs time to adjust to cold temperatures and the extra energy demands of staying warm.
- How to Train: Spend time outdoors in cold weather, gradually increasing your exposure. Practice layering clothing and managing your body temperature during activity.
Practice with Your Gear
- Why It Matters: Carrying your actual winter pack and using your equipment during training hikes helps your body adapt to the specific loads and movements you’ll encounter.
- How to Train: Go on practice hikes with your full winter kit, including boots, pack, and clothing. This also helps you identify and address any gear issues before your trip.
Monitor Your Health
- Why It Matters: Winter camping can exacerbate underlying health conditions. Ensure you’re in good health and consult your doctor if you have any concerns.
- How to Prepare: Address any injuries or chronic issues before your trip. Build up gradually to avoid overuse injuries.
By building endurance, strength, balance, and cold-weather resilience, you’ll be physically prepared to handle the rigors of winter camping. This preparation not only enhances your safety and comfort but also allows you to fully enjoy the beauty and challenge of the winter wilderness.
4. On the Trail
4.1. Travel Safely
Traveling safely during winter camping is about more than just moving from point A to point B—it’s about constant awareness, adapting to changing conditions, and making smart decisions to avoid hazards unique to the winter environment.
Start Early and Plan Your Day
- Maximize Daylight: Winter days are short, and darkness falls quickly. Begin your activities early to ensure you have enough daylight for travel, setting up camp, and handling unexpected delays.
- Time Management: Plan your route and pace realistically, accounting for slower travel in snow and the need for frequent breaks to adjust clothing, eat, and hydrate.
- Turnaround Time: Set a strict turnaround time to ensure you can return or reach camp before dark, even if you haven’t reached your intended destination.
Choose the Right Mode of Travel
- Snowshoes: Essential for deep or soft snow, snowshoes distribute your weight and prevent postholing (sinking deep into the snow), making travel more efficient and less exhausting.
- Skis: Backcountry or cross-country skis are ideal for covering longer distances over snow-covered terrain, especially on rolling or open landscapes.
- Crampons or Microspikes: On icy trails or steep slopes, these traction devices provide grip and help prevent slips and falls.
- Poles: Trekking poles with snow baskets offer stability and help with balance, especially when carrying a heavy pack.
Hazard Awareness and Avoidance
- Thin Ice:
- Assessment: Never assume ice is safe. Check thickness (at least 4 inches for walking) and look for signs of weakness: cracks, slush, running water, or changes in color.
- Avoidance: If unsure, detour around frozen lakes, ponds, or rivers. Carry ice safety gear (ice picks, rope) if you must cross.
- Avalanches:
- Assessment: Learn to recognize avalanche terrain—steep slopes (generally 30–45°), recent heavy snowfall, wind-loaded slopes, and signs of instability (cracks, “whumphing” sounds).
- Avoidance: Check avalanche forecasts before your trip. Carry avalanche safety gear (beacon, probe, shovel) and know how to use it. Travel one at a time across risky slopes and regroup in safe zones.
- Tree Wells:
- What They Are: Deep pockets of loose snow that form around the base of trees, especially evergreens. Falling into a tree well can trap and suffocate a person.
- Avoidance: Give trees a wide berth, especially after fresh snowfall. Travel with a partner and keep each other in sight.
Navigation and Route-Finding
- Trail Markers: Snow can obscure trails and signs. Use a map, compass, and GPS to stay on course.
- Landmarks: Identify and use prominent features (ridges, rivers, clearings) for navigation.
- Route Selection: Choose routes that minimize exposure to hazards (steep slopes, avalanche paths, open water) and maximize safety (gentle terrain, sheltered areas).
Group Safety and Communication
- Stay Together: Keep your group close, especially in poor visibility or hazardous terrain. Use a buddy system for added safety.
- Regular Check-Ins: Stop frequently to check on each other’s condition, adjust clothing, and assess the environment.
- Emergency Preparedness: Have a plan for what to do if someone is injured, lost, or falls into water or a tree well.
Adapt to Changing Conditions
- Weather Changes: Be prepared to alter your plans if weather deteriorates. Seek shelter or turn back if visibility drops or a storm approaches.
- Fatigue and Cold: Monitor yourself and your group for signs of exhaustion, hypothermia, or frostbite. Take breaks, eat and drink regularly, and adjust layers as needed.
By traveling with awareness, using the right equipment, and making safety your top priority, you’ll greatly reduce risks and ensure a more enjoyable and successful winter camping adventure.
4.2. Camp Setup
Setting up camp properly in winter is crucial for safety, warmth, and comfort. The right site selection and camp organization can protect you from the elements and reduce risks unique to the cold season.
Site Selection
- Shelter from Wind: Look for natural windbreaks such as dense tree stands, rock outcrops, or hillsides. Avoid exposed ridges or open fields where wind can strip away warmth and increase the risk of frostbite.
- Avoid Avalanche Paths: In mountainous terrain, never camp at the base of steep slopes, beneath cornices, or in known avalanche runouts. Study the terrain and check avalanche forecasts before choosing your site.
- Stay Clear of Falling Branches: Avoid camping directly under trees with heavy snow loads or dead branches (“widowmakers”), which can fall unexpectedly due to wind or warming temperatures.
- Cold Air Drainage: Don’t set up camp in low-lying areas like valleys or depressions, where cold air settles at night. Slightly elevated ground is often warmer and less prone to condensation.
Preparing the Campsite
- Pack Down the Snow: Before pitching your tent or hammock, stomp down the snow with your boots or snowshoes to create a firm, level surface. This prevents you from sinking during the night and provides a stable base for your shelter.
- Build a Windbreak: If natural wind protection is lacking, build a low wall of snow on the windward side of your tent. This helps block cold gusts and reduces drifting snow.
- Clear Overhead Hazards: Shake snow off branches above your tent or tarp, and avoid areas where icicles or snow slabs could fall.
Tent or Hammock Setup
- Anchoring: Use snow stakes, deadman anchors, or buried stuff sacks filled with snow to secure your shelter. Double-check all guy lines and anchors, as wind and shifting snow can loosen them.
- Orientation: Position your tent or tarp with the narrow end facing into the prevailing wind to reduce wind resistance and minimize flapping.
- Ventilation: Open vents or leave a small gap in your shelter to allow moisture to escape and reduce condensation, but avoid direct drafts on your sleeping area.
Organizing Your Camp
- Gear Storage: Keep essential gear (headlamp, water, snacks, extra layers) inside your tent or within easy reach. Use vestibules or gear lofts to keep items dry and organized.
- Drying Wet Items: Hang damp clothing or gloves inside your tent or under the tarp, but avoid blocking ventilation.
- Cooking Area: Set up your stove in a sheltered spot away from your sleeping area to prevent carbon monoxide buildup and reduce fire risk. Never cook inside a closed tent.
- Water Management: Store water bottles upside down and insulated to prevent freezing. Keep a backup supply inside your sleeping bag overnight.
Safety and Comfort
- Nighttime Checks: Before bed, check that your shelter is secure, vents are open, and snow is cleared from the roof.
- Emergency Plan: Know your escape routes in case of sudden weather changes or hazards like avalanches or falling trees.
By carefully selecting and preparing your campsite, building effective wind protection, and keeping your gear organized and dry, you’ll create a safe and comfortable base for your winter camping adventure.
4.3. Stay Warm and Dry
Staying warm and dry is the foundation of winter camping safety and comfort. Cold and moisture are your biggest adversaries—both can quickly sap body heat, increase the risk of hypothermia, and make your experience miserable. Here’s how to manage both effectively:
Change Out of Damp Clothes Immediately
- Why It Matters: Wet clothing loses its insulating properties and accelerates heat loss. Sweat, snow, or rain can all dampen your layers.
- After Activity: As soon as you stop hiking or finish camp chores, change out of any damp base layers, socks, or gloves. Even slightly damp clothes can chill you rapidly once you’re at rest.
- Dedicated Sleepwear: Always keep a set of dry clothes (especially base layers and socks) reserved for sleeping. Store them in a waterproof bag inside your pack.
- Layer Management: Adjust your clothing layers throughout the day to avoid sweating. Remove a layer before you start to overheat, and add one as soon as you feel a chill.
Keep Sleeping Gear Dry
- Waterproof Storage: Use dry bags or waterproof stuff sacks to protect your sleeping bag, sleeping pad, and extra clothes from snow, rain, or accidental spills.
- Tent Organization: Keep wet gear and boots in the vestibule or a separate area of your tent to prevent moisture from spreading to your sleeping area.
- Snow Management: Brush off snow from your clothing and gear before entering your tent. Even small amounts of snow can melt and dampen your sleeping bag or pad.
- Sleeping Bag Care: If your sleeping bag gets damp, air it out during the day when conditions allow—hang it in the sun or in a breezy spot.
Ventilate Your Tent to Reduce Condensation
- Condensation Risks: Breathing, sweating, and cooking inside your tent all release moisture, which can condense on the tent walls and drip onto your gear.
- Ventilation Strategies:
- Open tent vents or crack the door slightly, even in cold weather, to allow humid air to escape.
- Position vents opposite each other to encourage cross-ventilation.
- Avoid blocking vents with gear or clothing.
- Double-Wall Tents: These are especially effective at managing condensation, as the inner tent stays drier while moisture collects on the outer fly.
- Cooking Precautions: Never cook inside a closed tent; not only does it increase condensation, but it also poses a carbon monoxide risk.
Additional Tips for Warmth and Dryness
- Hot Water Bottles: Fill a sturdy water bottle with hot water and place it in your sleeping bag before bed to pre-warm your sleep system.
- Insulate from the Ground: Use a high R-value sleeping pad or double up pads to prevent heat loss to the cold ground.
- Hand and Foot Warmers: Chemical warmers can provide extra heat in gloves, boots, or sleeping bags during extreme cold.
- Drying Wet Items: Hang damp socks or gloves inside your jacket during the day or inside your sleeping bag at night to use your body heat for drying (only if they’re not soaking wet).
By proactively managing moisture and maximizing warmth, you’ll stay comfortable, healthy, and safe throughout your winter camping adventure—even in the harshest conditions.
Conclusion
Winter camping is a uniquely rewarding pursuit, offering solitude, pristine landscapes, and a sense of accomplishment that few other outdoor experiences can match. However, the challenges of cold, snow, and unpredictable weather mean that success and safety depend on thorough preparation and sound judgment.
The Importance of Careful Planning
Every successful winter camping trip begins long before you set foot on the trail. Researching your destination, understanding the terrain, monitoring weather conditions, and informing others of your plans are all essential steps. These actions help you anticipate potential hazards, avoid dangerous situations, and ensure that help can reach you if needed.
The Role of Proper Equipment
Having the right gear is not just about comfort—it’s about survival. Four-season shelters, well-insulated sleeping systems, layered clothing, reliable stoves, and comprehensive safety kits are all critical. Specialized equipment like snowshoes, avalanche gear, and satellite communicators can make the difference between a manageable challenge and a life-threatening emergency. Testing and practicing with your gear before your trip ensures you know how to use it efficiently, even in harsh conditions.
The Value of Skills and Experience
Knowledge and practice are as important as equipment. Skills such as building a snow shelter, starting a fire in wet conditions, navigating in whiteout, and recognizing signs of hypothermia or frostbite can save lives. Physical preparation—building endurance, strength, and cold tolerance—enables you to handle the rigors of winter travel and camp life.
The Rewards of Preparation
When you prepare thoroughly, you unlock the true joys of winter camping:
- Peace and Solitude: Experience the quiet beauty of snow-covered forests and frozen lakes, often with few other people around.
- Personal Growth: Overcoming the challenges of winter builds confidence, resilience, and a deeper connection to nature.
- Memorable Adventures: The stories and memories from a well-executed winter trip will last a lifetime.
Final Thoughts
Winter camping is not to be taken lightly, but with respect for the environment, diligent planning, and the right mindset, it can be one of the most fulfilling outdoor experiences. By equipping yourself with knowledge, skills, and reliable gear, you’ll be able to embrace the beauty and tranquility of the winter wilderness—safely, comfortably, and with confidence.
Preparation is the foundation of safe and enjoyable winter camping. Invest the time and effort before your trip, and you’ll be rewarded with unforgettable adventures in the heart of winter’s embrace.


Leave a Reply