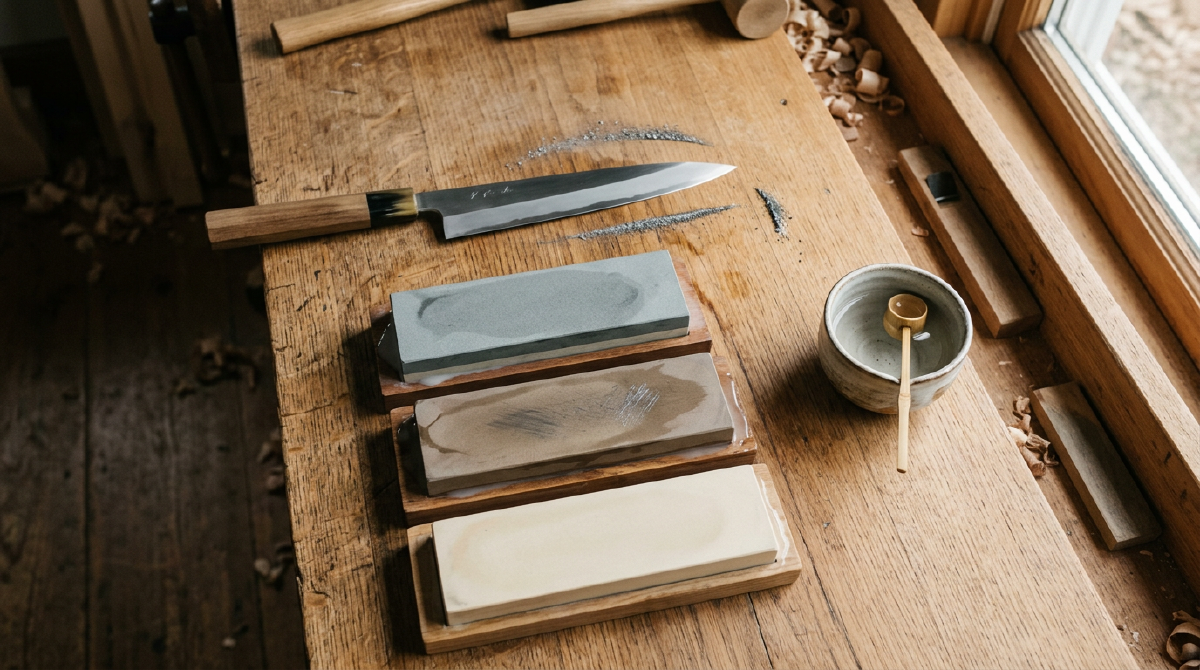
Most Western cooks sharpen knives with a symmetric edge: the blade is ground to the same angle on both sides, meeting in a vee at the center. A Japanese single-bevel (kataba) knife is fundamentally different, and it is impossible to sharpen one correctly without first understanding that difference. Where a double-bevel edge is symmetric, a single-bevel edge is deliberately asymmetric, with the entire cutting face ground flat on one side and a single angled bevel on the other.
In the case of a kiritsuke, the front side bears the dominant bevel. The back of the blade — the side facing away from you as you cut — is almost completely flat, hollowed very slightly toward the edge to reduce friction, like the concave face of a Japanese razor. This hollow is called the ura. On the flat side, the only relief is a narrow strip along the very edge itself, called the ura-suki, which is the only part of the flat side that actually meets the stone. Most of the flat face never touches the stone at all.
The architectural logic of this design is worth pausing over. Because the entire cutting wedge is formed on one side, the edge can be dramatically acute — often around 12 to 15 degrees, far narrower than the 20-degree inclusive angle typical of a double-bevel knife. The resulting cut is extraordinarily precise, which is exactly why these knives are prized for slicing fish for sashimi and for fine vegetable work: the blade bites cleanly and releases food from the flat side with almost no resistance. The trade-off is that this asymmetry makes the knife directional. Cut with the flat side facing the food you are not trying to slice thin, and the blade will tend to steer or wander.
Understanding the geometry also dictates how you will approach the stone. The balance of the edge depends on preserving the ura at all costs, because it is the ura that keeps the flat side flat. Attack the ura carelessly and you will round the back of the blade, destroying the knife’s signature sharpness. For this reason, the single-beam sharpening ritual is less about a single motion and more about respecting two very different faces, each of which must be treated on its own terms.
The Sharpening Process#
Sharpening a single-bevel knife on a whetstone is a deliberate, almost meditative ritual, and it follows the same broad sequence for any blade: grind a fresh edge, refine it, then create a final polished edge. The difference lies entirely in how each step is executed on an asymmetric blade, and it is this asymmetry that turns what would otherwise be a straightforward chore into a matter of constant attention. Where a double-bevel knife lets you strop back and forth across the stone mechanically, a single-bevel knife forces you to think about which face is being touched, in what direction, and with what pressure, every single pass. To sharpen one properly is to develop a sensitivity to the steel that you simply never need on a symmetric blade.
Preparing the Stone and the Blade#
Before the first pass, everything hinges on a flat, stable stone and a clean, dry blade. The stone must be soaked or flushed with water according to its type, because a dry stone clogs instantly and a stone that is not properly hydrated cuts poorly and generates heat. The blade is wiped to remove any food residue, oil, or — most importantly — any trace of the previous kitchen session, because a single hidden fleck of grit pressed against the edge can chip the wafer-thin steel. The knife should also be held firmly but without rigidity; a locked wrist that fights the blade will only transfer its own tension into uneven passes. Find the position where the edge meets the stone along its whole length, and let that contact be the beginning of your attention rather than a gesture you rush through.
Establishing the Edge on the Front Bevel#
The flat side is almost always worked last, and for a reason that follows directly from the geometry you now understand. The conventional order is to establish the edge on the beveled front side first, and only then work the ura-suki on the flat side to remove the burr that the front-side work has raised. Doing it the other way around is not merely unconventional but actively counterproductive, because any rounding of the flat side that happens first becomes the foundation that the front bevel then has to cut against, and a rounded back produces a blade that never quite bites.
When you sharpen the front bevel, hold the edge against the stone and work it with a sweeping stroke that follows the curve of the blade from the heel toward the tip. This matters more than it might seem: a kiritsuke, like most single-bevel blades, has a curve to its cutting edge, and working straight across would grind a flat facet into a curve, destroying the blade’s living profile. Follow the arc naturally, rolling the knife through the stroke so that every section of the edge spends the same amount of time on the stone. Critically, you rely on the natural angle of the blade against the stone rather than forcing a fixed angle, because the existing bevel is your best guide — it is already cut to the correct geometry, and if you lay it flat and keep it from rolling, the whole front face will meet the stone in full contact. This is the opposite of sharpening a Western knife, where you must consciously hold a precise angle; here the bevel does that work for you, if you let it.
Pressure deserves its own deliberation, because it is the most common silent error. Keep it consistent and moderate. Too little pressure does nothing but polish the surface, polishing being a distinct act from cutting; you are grinding away steel to form an edge that must eventually reach the very apex, and gentle touches alone will only work the higher portions of the bevel. Too much, on the other hand, flexes the thin steel of the knife — and at twelve to fifteen degrees that steel is staggeringly thin — bending the edge away from the stone and rounding it rather than flattening it. The ideal is a firm, even bearing across the whole bevel, enough to feel the stone bite but never enough to feel the blade give. You will learn this pressure as a sensation before you can name it, and you should trust that sensation over any measurement.
Raising and Reading the Burr#
After a number of passes on the front bevel, evidence of genuine cutting arrives in the form of a burr — a thin, feathered lip of steel pushed out along the edge on the opposite side. The burr is not a flaw to be feared but the most honest teacher in sharpening, because it is the only reliable signal that the stone has actually cut all the way through to the edge rather than merely abrading the surface of the bevel. Its arrival is the moment when you know you have truly met the apex, and it is the criterion by which you decide whether to remain on a stone or advance to the next.
To check for it, run a fingertip lightly and with great care from the heel toward the tip along the flat side, never drawing your finger across the edge itself, and feel for the faint, almost velvety roughness that marks the burr. What you are feeling for is not whether a burr exists but whether it exists everywhere. It should travel consistently along the whole length of the edge, from heel to tip, with no bare, smooth section in between; if the burr is present in the middle but absent at the tip or the heel, that portion of the edge has not met the stone and you must continue to work it. This is why the rule is so emphatic: never switch stones until the burr has travelled the full length, because the burr is your proof that the previous grit has actually cut to the edge. If no burr appears at all, the bevel is not yet meeting the edge — often because you have been holding the blade at slightly too high an angle, so only the top of the bevel is touching — and you must stay on the current stone until it does. Skipping this check is how knives end up with a phantom edge, sharp in patches and dull in others, that no amount of later finishing can repair.
The Delicate Business of the Ura-suki#
Now come the two most important movements in the entire process, and the reason single-bevel sharpening intimidates many people: the handling of the flat side and its precious ura-suki. The burr you just raised sits on the flat side, and it must be removed, but the way you remove it is everything. Here the temptation to simply flatten the whole back of the blade against the stone is almost irresistible, because it feels like the obvious way to grind off the burr — and it is exactly wrong, because doing so would rub steel away from the flat face and destroy the hollow that makes the knife special.
To work the ura-suki correctly, you press lightly on the very edge of the flat side, directly over the hollow, so that only that narrow strip along the edge ever touches the stone, and you draw the blade across with a short, controlled motion. The width of steel you are bringing to the stone is only a millimetre or two, the barest ribbon above the edge, and the entire skill of this movement is keeping the contact confined to that ribbon. You are not grinding the flat face; you are flattening and truing only the tiny bearing surface at its perimeter. Done properly, this both removes the burr and produces a perfectly square, even ura-suki that keeps the edge aligned with the geometry of the knife.
The pressure here is the make-or-break variable, and it is where beginners most often go wrong by pressing too hard into the hollow and flattening it. The ura-suki is a whisper of steel, and it requires a feather-light touch, at most a fingertip’s weight; grinding it with force rounds the back of the edge and, worse, digs into the hollow itself, widening the ura-suki and eroding the concave relief that gives the blade its low-friction release. A knife that has been overworked this way feels thicker and stickier on the flat side and no longer slices with the effortless separation of a properly maintained blade. Learn to work the ura-suki with restraint, and you will preserve the geometry; allow force to creep in even once, and you begin a slow campaign of damage that is difficult and expensive to reverse.
Working Through the Grits#
The entire sequence — front bevel, then ura-suki — is repeated once per grit, from coarsest to finest, and the ura-suki should always be the final pass at each stage. This repetition is not a matter of pedantry; it is the very structure of the process, and it is worth understanding why each stage must be approached as a complete, self-contained cycle rather than as a loose hop through the stones. Every stone you use represents a distinct scale of steel removal, and the edge you hand to the next stone is the foundation that the next stone must build upon. If you were to sharpen the entire front bevel through all four grits and then touch the flat side only at the very end, you would be drawing a clean, fine edge out of the front while the back remains in the rough, coarsely-ground state of the last stone that actually touched it. The geometry would be out of balance in every sense, the flat side carrying the deep scratches of the early stages even as the front gleams with a fine finish, and all that fine front work would be undone the moment the flat side finally got its due. Keeping the two faces in lockstep, moving them through each grit together, is the only way to preserve the delicate equilibrium that makes a single-bevel knife what it is.
Why the Ura-suki Is Always Last#
There is a specific reason the ura-suki must be the final pass at every single stage, and it goes to the heart of how the two faces behave. Each side produces its own debris and its own state of the edge. Grinding the front bevel throws up a burr — that feathered lip of steel — that deposits itself on the flat side, and grinding the flat side, in turn, produces its own metal that must be cleared away. If you touch the front bevel and immediately set aside the knife, the burr sits there on the flat side, and if you switch stones without addressing it, you carry that coarse, feathered state forward. Leaving a burr on the flat side when you switch to a finer stone is acceptable only in the narrow sense that the finer stone will itself remove it in the course of its own work, but the cleaner the foundation at each stage, the cleaner the next stage can be. The ura-suki is the delicate element of the whole assembly, and it should always be the last thing touched before you move on, so that the final state of the edge at the close of each stage is the fine, square flat strip rather than the freshly-cut, feathered front. You want to arrive at the next stone with the edge already settled on that clean, flat bearing, because that is the surface the next stone will refine rather than one it must first rescue.
The Discipline of the Burr#
It is worth understanding why the burr governs the move to a finer stone with such discipline, because the principle is not intuitive and its neglect is the source of more ruined edges than any other single lapse. Every stone cuts at a characteristic roughness, leaving tiny scratches in the steel at its own particular scale. A coarse stone leaves deep, widely-spaced grooves; a finer stone leaves shallower, more closely-spaced ones; and each transition in grit is really a question of whether the new stone can reach down beneath the floor of the previous one’s damage. When a finer stone meets the edge, it must remove all of the scratches left by the coarser stone and cut the edge down to a new, sharper apex, which obliges it to remove a layer of steel at least as thick as the depth of the previous scratches, ideally a little more to leave a clean, undamaged surface underneath. If the previous stage did its work properly, the finer stone has only a thin, uniform layer of damage to clear away, and it does so easily and evenly. If the previous stage was rushed, the deeper scratches remain.
What follows from this is easy to overlook: the scratches become stress risers. Buried beneath a fine finish, those deeper, coarser grooves act as points of weakness in the steel, places where stress concentrates along the edge in use. An edge that looks beautiful to the naked eye can conceal a subsurface of large, angular scratches, and when you take that knife to a cutting board or through a row of vegetables, the stress gathering at those buried notches finds release not in a clean slice but in an edge that chips and dulls far sooner than it should. The visible polish is a lie if it sits on a foundation of unremoved damage, and the only way to know the foundation is sound is to respect the burr. If you skip a grade, or if you move on while the burr is still not fully formed and consistent along the edge, you trap that coarse damage beneath the finer layers and condemn the blade to a short, brittle life.
The burr, then, is your honest report that each layer has been fully removed, and your patience at this checkpoint is repaid in an edge that holds far longer than one whose grits were rushed. It is worth dwelling on what a complete, consistent burr actually signifies: it tells you that the stone you are on has cut all the way through to the very apex of the edge along its entire length, that no section has been neglected, and that the full surface of the bevel is now sitting in the same plane of contact. A burr that appears only in the middle means the tip or heel still has not met the stone. A burr that is weak or absent means the bevel is not yet meeting the edge. Only when the burr runs unbroken from heel to tip, and when the pressure has been even enough to form it at a uniform fineness, can you trust that this grade is genuinely done and that the next stone will have a clean, even layer to work. Chasing a mirror polish while ignoring this checkpoint is like painting a wall you have never scraped; the finish dazzles from a distance and fails on contact.
The Rhythm of Each Grit#
There is a quiet rhythm to working through the grits that emerges once the discipline is internalised, and it is worth describing because it is the feeling that separates a competent sharpener from one who fights the knife. On a coarse stone, the work is vigorous and assured; you are reshaping steel, and the burr forms quickly, sometimes after only a handful of passes, because so much material is being removed. The pressure is firm and the strokes are long, and the burr arrives as a substantial, easily-felt ridge. On the medium stone, the tempo shifts; less steel needs removing, the burr forms more softly and less quickly, and the pressure must lighten so that you refine rather than carve. By the time you reach the finishing stones, the burr is a whisper, barely perceptible, forming after many patient passes with a gentle touch, and the entire disposition of the session changes from reshaping to polishing. This is why rushing feels doubly wrong on a single-bevel knife: not only does it leave damage buried, but it throws off that natural rhythm, pushing you to apply finishing-stone delicacy to rough work or coarse-stone force to fine work, either of which wrecks the edge you are trying to create.
The whole affair is a slow process, and it is supposed to be; indeed, no part of the rhythm can be meaningfully accelerated. The ritual is the point, and the resulting edge justifies every minute of it. A sharpener who has internalised the discipline no longer thinks in terms of stones or passes but in terms of layers and burrs — of building an edge from the coarse foundation up, checking at every level that the damage has been fully cleared, and only then moving upward to a finer finish. It is, in its way, the closest thing the kitchen offers to the patient craft of a silversmith or a swordsmith: the slow, methodical layer-by-layer refinement of a single, deceptively simple piece of steel into something whose edge is not merely sharp but structurally sound, an edge that will hold its keenness through weeks of hard use because it was never asked to carry the damage that rushed work leaves behind.
The Sequence of Grits#
A complete sharpening moves through three broad grades: coarse stone for setting or repairing the edge, medium stone for establishing the bevel, and finishing stones for the final polish. The exact grit numbers vary by manufacturer, but the logic is consistent.
| Stage | Grit range | Purpose |
|---|---|---|
| Coarse | 200–400 | Repair damage, set a new edge or geometry |
| Medium | 800–1500 | Establish and true the bevel |
| Finishing | 4000–6000 | Refine and strengthen the edge |
| Polishing | 8000+ | Final polish, mirror bevel (optional) |
On a very dull or damaged knife, begin at coarse to re-form the bevel, then move to medium to remove the coarse scratches and define the edge, and finish at 4000 to 6000 for a working sharpness. The 8000-and-above stones are for a final polish that is more about aesthetics and the very last fraction of refinement than about function; for everyday use a well-executed 4000 finish is already excellent. At each transition, do not skip stones wildly — moving from coarse straight to fine leaves scratches and a weak edge, because each finer stone must remove the scratches of the previous one, and gross jumps leave the deep scratches behind.
The Best Stones for Sharpening#
The choice of stone matters more for a single-bevel knife than for a double-bevel, because the knife demands both a stone that cuts cleanly at a low angle and a flat, stable surface on which to work the delicate ura-suki. Two categories dominate.
For the coarse and medium work, a quality synthetic waterstone is the practical first choice. Synthetic stones from makers such as King, Naniwa, and Shapton offer consistent grit, cut fast, and are inexpensive enough to replace as they dish and wear — and they will dish, because the method concentrates pressure in a small area. For the finishing stages, many serious cooks turn to a natural finishing stone, or the synthetic equivalent such as a Naniwa or Shapton in the high grits. Natural stones are prized for producing a slightly toothier edge that bites into fish skin and tomato peel, but they are inconsistent and costly, so a fine synthetic is a more forgiving place to begin.
What matters above all is flatness. Unlike sharpening a double-bevel knife, where a slightly dished stone can be compensated by rolling the blade, the flat back of a single-bevel knife demands a stone that is truly flat across its whole surface, or the tiny ura-suki will not meet it evenly. Budget for a flattening plate — generally a diamond or silicon-carbide lapping plate — and true the surface of every stone before each session, then check it again after the coarser passes, which dish the fastest. It is impossible to overstate how central this single piece of equipment is to doing the job properly.
Common Mistakes to Avoid#
There is an irony at the heart of single-bevel sharpening: the skills that make a double-bevel knife easy to maintain are precisely the instincts that must be unlearned here. What passes for good technique on a Western knife — pressing firmly, honing both faces equally, holding a rigid angle — is, on a kataba blade, the very thing that slowly destroys it. Because the knife is asymmetric, the failure modes are asymmetric too, and each of them tends to cluster around one face or one habit rather than being spread evenly across the process. Recognizing these errors before they become permanent damage is half the battle; the other half is resisting the deep-seated instincts that produce them.
The Weight of the Hand#
The most damaging and most common mistake is pressing too hard on the flat side. It is the first instinct of almost every beginner, and it is the hardest to overcome, because firm pressure is exactly what feels productive. The ura-suki, remember, is a whisper of steel — a strip only a millimetre or two wide along the very edge of the blade — and grinding it with force does two bad things at once. It rounds the back of the edge, so the flat side no longer meets the stone as a clean, square bearing but as a slightly curved surface that refuses to sit flat, and it flattens the hollow, widening the ura-suki until the concave relief that gives the knife its character is eroded away. The two consequences compound each other. A rounded back means the edge will not align with the geometry of the front bevel, and a flattened hollow means the blade loses the low-friction release that makes single-bevel knives special, the effortless way the food separates from the flat face. What once sliced cleanly through a fillet of fish now drags and sticks, because the very structure that produced the clean cut has been ground away.
The prescription sounds almost too simple to matter: the flat side should always be touched with a light, fingertip pressure, and only along that narrow strip. But the discipline behind it is not simple at all. It means resisting the urge to lean into the stroke, trusting that a feather-light touch with many passes will do the work that a few firm passes would do destructively. It means remembering, every single session, that the ura-suki is not a surface to be ground but a bearing to be gently trued, and that the entire craft of this movement is in its restraint. The hand that learns this lightness is the hand that keeps a single-bevel knife alive for decades; the hand that insists on force is the hand that writes its expensive epitaph.
The Temptation to Overtreat the Back#
A related error is sharpening the flat side too often, or on too coarse a stone. Once a cook has learned how easily the ura can be damaged, there is a natural impulse to over-correct by attending to it constantly, touching it up on every stone at every session, as though it were just another face of the blade to be maintained with equal vigour. This is a category error. The ura does not need to be restored on every session the way the bevel does, because the bevel is the surface that does the active cutting and wears with use, while the flat side is largely protected, never touching the board, only grazing the food. If the blade is only lightly dull, the correct response is to work the front bevel and then pass once to a fine stone to remove the burr, nothing more; the coarse work on the ura-suki should be reserved for the rare times the back actually needs retruing — when it has been dinged, or when a session of careless force has already rounded it. Every session that unnecessarily grinds the flat side removes a little more of the precious hollow, and because that removal is irreversible, over-treating the back is quietly and permanently destructive in a way that over-sharpening the front never is.
It is worth being blunt about the stakes, because they are easy to underestimate until they are gone. The ura and the ura-suki are not replaceable parts; they are carved into the original blade, and once the hollow is ground flat or the edge is rounded, no amount of future care will restore them, short of sending the knife to a professional with the knowledge and equipment to re-grind the back. Over-aggressive ura work is the fastest route to ruining a blade worth hundreds of euros, and unlike a dull edge, which is a temporary state, a flattened ura is a permanent one. The careful cook treats the back of the knife the way a parent treats a porcelain heirloom: with respect born of the knowledge that it cannot be remade.
The Quiet Sabotage of a Worn Stone#
Failing to flatten the stone is a quieter but equally serious mistake, and it is the one most likely to pass unnoticed because its effects are diffuse and gradual. A double-bevel knife can survive a slightly dished stone because the rolling motion of the blade across it evens out the imperfections; you never notice that the centre of the stone is a fraction hollow because the blade is always rocking across it. A single-bevel knife enjoys no such mercy. The flat back of the blade demands a stone that is truly flat across its whole surface, and the moment the stone develops even a slight dish, the ura-suki can no longer meet it evenly. The blade rocks slightly as you work, one portion of the strip touching while another floats above a hollow, and the result is that the flat side gradually acquires an uneven, slightly rounded profile without you ever being able to point to a single wrong pass that caused it.
The dished stone does damage on the front side too, though in a subtler way. Because the front bevel is flat and you rely on it settling naturally on the stone, a concave stone changes the effective angle at which the bevel meets it — the knife tilts up over the hollow in the centre, cutting at a different angle there than it does at the edges, so the edge never reaches a consistent profile no matter how patiently you work. Every stroke at a dished stone is, in effect, sharpening at a slightly different angle than the one before, and the accumulating inconsistency is why a knife can be worked for an hour and still refuse to hold a clean edge. The solution is the same as the prevention: treat the flattening plate as a required tool, not an accessory. In a single-bevel sharpening kit, the lapping plate is not an optional extra that the fastidious cook happens to own; it is as much a part of the process as the stones themselves. Flatten before and during every session — before, so that the surface you begin with is true, and during, because the coarser passes dish the fastest, and a stone checked only at the start will be already compromised by the time you reach the finer grits that depend most on a level surface.
The Temptation of the Perfect Angle#
Finally, many novices try to hold a rigid, perfect angle the way they would with a guided system, measuring the blade against the stone as though precision were a matter of forcing the steel to a precise orientation. It is an understandable instinct, because the entire modern vocabulary of knife sharpening is built around angles — the twenty-degree edge, the fifteen-degree bevel — and it feels negligent to abandon precision. But on a single-bevel knife, this is unnecessary and slightly counterproductive, and trying to do it actively undermines the result. The existing bevel is flat, and the blade naturally settles at the correct angle when laid on the stone, because the bevel itself encodes the geometry; your job is not to impose an angle but to let the steel find its own, to keep it from rolling off that settled contact rather than to force it into a fresh one.
Overthinking the angle leads directly to the rocking motion that is the signature failure of the over-eager sharpener. In an effort to keep the blade at a precisely held angle, the hand unconsciously tilts and shifts it, dipping the tip and lifting the heel and back again, and every micro-rock grinds a slightly different surface than the one before. The result is an uneven, wavy edge, a blade whose bevel reflects every tremor and indecision of the hand that made it, beautiful at the apex and ruined just behind it. The antidote is almost a surrender: let the flat bevel find the stone, keep the pressure steady and light, follow the curve of the blade end to end, and trust the burr as your guide through the grits. The burr, as always, is the honest arbiter — it will tell you whether the whole edge has been cut evenly, and it will not lie about the wobbles you are too close to the work to see. In the end, the greatest skill in single-bevel sharpening is not force or measurement but release: the willingness to stop controlling and start listening to what the steel and the stone are telling you.
Conclusion#
If there is a single thread running through everything that has come before, it is that a single-bevel knife asks to be understood before it asks to be sharpened. The geometry is not a minor detail to be glanced at and forgotten; it is the whole argument of the blade. Every decision in the sharpening process — which face to touch, in what order, with what pressure, on what stone — flows directly from the fact that one side is a flat, fragile hollow and the other a single sweeping bevel, and that the two meet in an edge narrower and keener than any symmetric blade can manage. Once that architecture is held clearly in mind, the method stops being a collection of rules to memorise and becomes something natural, even inevitable.
The process itself rewards a certain temperament. It is deliberate and unhurried, unspooling through layers of steel one grit at a time, checking the burr at every stage as the honest witness that the work is being done properly. It demands restraint where instinct urges force, patience where impatience aches for shortcuts, and trust in the burr and the flat bevel over the seductive fiction of a measured, rigid angle. It is, in short, the opposite of rushing — and that is precisely why it works, and why the edge it produces holds so much longer than one taken through a careless, rapid pass.
Even the mistakes trace the same shape. Press too hard on the flat side and you erode the very geometry that makes the knife special. Grind the back too often and you spend an irreplaceable asset. Ignore the flattening plate and you sharpen against an enemy you cannot see. Chase a perfect angle and you introduce a wobble that no care can later remove. Each failure is, at bottom, a failure to respect the asymmetry and the flatness that define this kind of blade — a reminder that the tool’s genius lies not in what you add to it but in what you refuse to take away.
In the end, sharpening a single-bevel kiritsuke is less a technique to be memorised than a relationship to be entered into: a conversation between a deliberately asymmetric piece of steel and a perfectly flat stone, conducted in the language of grit and burr and patient, feather-light touch. Master the geometry, respect the ura, keep your stones true, and the knife will reward you with years of edges cleaner than any symmetric blade can deliver — and with something quieter as well, the satisfaction that comes from tending a fine thing with skill enough to keep it so. The knife gives back what you give it, but only what you give it. Approach it with force and haste, and it will humble you; approach it with understanding and patience, and it will serve you brilliantly for a nlifetime.